Help with a small pan American pulse jig build

jabby

Jr. Member
Feb 11, 2018
24
1
Primary Interest:
All Treasure Hunting
Hey guys,

New to this site but you guys seem awesome and informative!

I am trying to build (3d print) a pan American pulse jig but I am not getting a pulse.

I have tried many designs, many different diaphragms plungers etc.. but can't get a pulse! =/

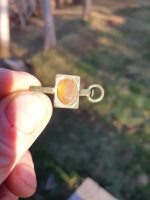
I will take a pic and let me know your thoughts please.

IMG_2499.JPG IMG_2508.JPG IMG_2507.JPG IMG_2500.JPG IMG_2501.JPG
 

pepperj

Gold Member
Feb 3, 2009
37,440
138,782
🥇 Banner finds
1
Detector(s) used
Deus, Deus 2, Minelab 3030, E-Trac,
Primary Interest:
Relic Hunting
What's its purpose? If it's for recovery of gold maybe try the Gold Prospecting section of the forum.
 

Jim in Idaho

Silver Member
Jul 21, 2012
3,320
4,698
Blackfoot, Idaho
Detector(s) used
White's GM2, GM3, DFX, Coinmaster, TDI-SL, GM24K, Falcon MD20, old Garrett Masterhunter BFO
'Way Too Cool' dual 18 Watt UV light
Primary Interest:
Prospecting
Welcome to the forum. Showing pics of the disassembled parts won't help diagnosing your problem. Need to show the entire assembled unit.
Jim
 

OP
OP
J

jabby

Jr. Member
Feb 11, 2018
24
1
Primary Interest:
All Treasure Hunting
Thank you, sorry okay I will take a video of what is going on but basically the water keeps leaking from the plunger output shaft, I feel like it doesn't want to stay vertical when it wants to pulse but yes I will re assemble and take a video.
 

OP
OP
J

jabby

Jr. Member
Feb 11, 2018
24
1
Primary Interest:
All Treasure Hunting
diamond and gemstones
 

Gambrinus

Sr. Member
Dec 25, 2015
313
479
Primary Interest:
All Treasure Hunting
Where I work we used to manufacture this type of jig and one thing I know is they should not leak, so you will have to fix that, maybe with silicone around the square part of the carriage bolt and under the round head. The jigs we made were a little different than yours, instead of using a carriage bolt it had threaded rod with 1\8" thick rubber sandwiched between stainless steel washers and nuts like the diaphragm on yours and never had a problem leaking.
Also I wonder if you are missing some parts, the yellow part were the bolt goes through on ours was threaded for the bolt and on the end of the bolt was a knob so you could adjust the pulse of the jig.
Here is a pic of the diaphragm part which might give you an idea of what I am talking about. Also these jigs work for gold as well as diamonds and gems. P328.GIF
 

Last edited:

Gambrinus

Sr. Member
Dec 25, 2015
313
479
Primary Interest:
All Treasure Hunting
I reread your post and I realized that you are trying to build a jig and not fix a jig [getting old has it's drawbacks]. Anyway another issue I can see is the spring you are using is too long. Another is the bolt is too long, you should use two bolts one for the diaphragm and then one on the other end of the spring which would go through the hole in the yellow part and as I said above it should have some type of handle and be able to adjust compression on the spring.
 

OP
OP
J

jabby

Jr. Member
Feb 11, 2018
24
1
Primary Interest:
All Treasure Hunting
No and yes, first off THANK YOU. I am trying to fix the jig I made. I love your input its very valuable. I am going to try to switch to a rod with the rubber sandwiched between them because I believe the issue is on the plunger. I am not getting leaks anywhere else except when it springs open but does not close right so maybe the two washer will help keep it horizontal so it stays flush.

I really appreciate your help.
 

OP
OP
J

jabby

Jr. Member
Feb 11, 2018
24
1
Primary Interest:
All Treasure Hunting
What would be the best material for the diaphragm and the plunger? Yes I am also missing the control valve at the top to increase the pressure but I first wanted to at least get it to jig(pulsate)

Any insights you have I will try.
 

Gambrinus

Sr. Member
Dec 25, 2015
313
479
Primary Interest:
All Treasure Hunting
We used 1\8" or 3\16" [it was 30 years ago] impregnated rubber. Like conveyor belt material similar to this https://www.indiamart.com/superindiarubberproducts/rubber-compound-sheet.html. for the diaphragm and using the same rubber that was cut like a washer which would in your case be under the head of the carriage bolt and the outside diameter of the washer would be the same as the large disc.
You don't use a plunger the part you have right under the bolt head is too big and too long, it is just blocking the water it should only be a flat washer there.

You really do need to have the spring adjustable to make it work, so cut the spring just long enough to have a loose fit, then turn on the water then you start screwing in the knob until it starts pulsing.
I know I am confused reading what I wrote but I think in time I may be able to help you get it going.
 

OP
OP
J

jabby

Jr. Member
Feb 11, 2018
24
1
Primary Interest:
All Treasure Hunting
No its not confusing at all, after months I finally have a feeling of relief that this thing might actually work because of you.

okay I will order the parts to make a new plunger squished between two washers and a diaphragm to fit.


I will also fix the spring issue.

Am I putting the rubber washer on the outside of the metal washer, so the rubber would come in contact with the outlet of water correct?


IMG_2517 2.jpg IMG_2517 2.jpg IMG_2517 2.jpg


remove indentation in red and make the green part smaller and all one level, correct?

IMG_2517 2.jpg IMG_2516 2.jpg

If I am envisioning this correctly, the metal washer will be hitting the outlet of the water to stop and allow the flow?


I really appreciate this.
 

OP
OP
J

jabby

Jr. Member
Feb 11, 2018
24
1
Primary Interest:
All Treasure Hunting
Sorry I forgot to mention , what I circled in red is what I am removing and green keeping.
 

OP
OP
J

jabby

Jr. Member
Feb 11, 2018
24
1
Primary Interest:
All Treasure Hunting
I thought this might help.

betterlook.jpg
 

Gambrinus

Sr. Member
Dec 25, 2015
313
479
Primary Interest:
All Treasure Hunting
I thought I would try to explain in a different way.
So you should cut a rubber washer the same diameter as the large disc on your carriage bolt.
The part that is under the head of the carriage bolt need to be thinner like a washer.
Next make a spacer about 3\4" long with the ID sized for the bolt and the OD sized to fit the inside of the spring.

The parts now are bolt, small disc, rubber washer, large disc, spacer and then a nut.
I think that we also used rubber cement to glue the rubber washer to the large disk, it may not be necessary and may depend on
how stiff your rubber washer is.
 

OP
OP
J

jabby

Jr. Member
Feb 11, 2018
24
1
Primary Interest:
All Treasure Hunting
Got it, I am going to get the parts and give it a try! I really appreciate your help.
 

Gambrinus

Sr. Member
Dec 25, 2015
313
479
Primary Interest:
All Treasure Hunting
remove indentation in red and make the green part smaller and all one level, correct?

Yes but now refer to your post #15 and were you drew a red line and say water outlet is were we had a part with the taper machined out of aluminum. The taper was just machined on the inside only and the outside was straight, unlike the drawing.
 

Gambrinus

Sr. Member
Dec 25, 2015
313
479
Primary Interest:
All Treasure Hunting
Avery crude drawing of the water outlet part. The green line represents the surface of your green line in post #13. part.png
 

Gambrinus

Sr. Member
Dec 25, 2015
313
479
Primary Interest:
All Treasure Hunting
Diaphragm parts.
grey. nuts and bolts
black. washers
red. rubber washer
green. diaphragm
blue. spacer for spring diaphragm.png
 

Top Member Reactions

Users who are viewing this thread

Latest Discussions

Top