eppingera
Full Member
- Aug 29, 2012
- 124
- 77
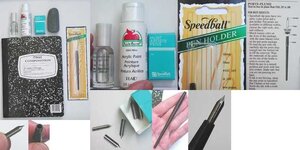
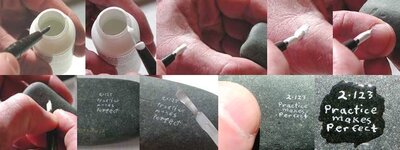
What are some safe ways to mark points and artifacts in order to document where they were found but not damage or disfigure them permanently? I've seen what looks like white out marked with ink or marker written right on the artifact...
Amazon Forum Fav 👍


Upvote
0