Anyone out there interested in making there own Coils

BamofNH

Jr. Member
Aug 20, 2007
50
4
Chester, New Hampshire
Detector(s) used
Minelab Explorer SE Pro, Tesoro Conqistador umax, Fisher F75
Primary Interest:
Metal Detecting
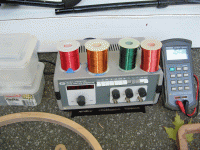
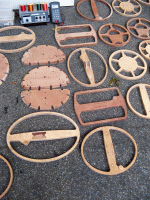
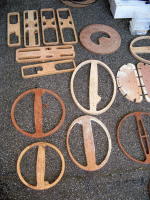
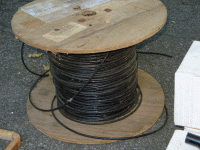
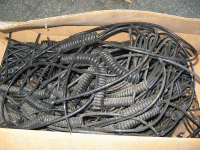
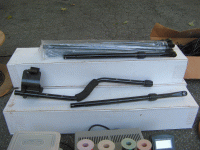
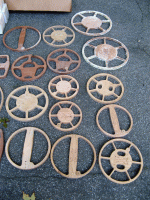
A friend of mine (CharlesupstateNY) gave me a bunch of stuff that he no longer wanted when he moved. He gave me a lot of different size wooden coil frames he made for a vacuum mold system he also made. I thought it would be neat to try making my own coils, but have never got around to trying. So I don't think I ever will and have decided to pass it all on to someone else that may want to try. I'm not looking for any money for all of it, but I don't want to pay for shipping either. Along with the coils are coil cables already made-up, areel of coil cable, lots of forms, some upper and lower shafts, a frequency generator, an Inductance Meter and a bunch of small hardware. Here are some pictures.
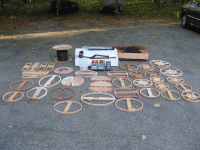
Everything.gif Coil Wire and Meters.gif Coil Molds 2.gif Coil Molds 1.gif Coil Cable Reel.gif Coil Cable made to Length.gif Shafts, Upper and Lower.gif Coil Molds 3.gif
 

OP
OP
BamofNH

BamofNH

Jr. Member
Aug 20, 2007
50
4
Chester, New Hampshire
Detector(s) used
Minelab Explorer SE Pro, Tesoro Conqistador umax, Fisher F75
Primary Interest:
Metal Detecting
Shafts have been spoken for, everything else is still available. These coil forms look like art. Hang them in your Detector Room if you don't feel like making coils. :laughing7::dontknow::laughing7:
 

Tom_in_CA

Gold Member
Mar 23, 2007
13,837
10,360
Salinas, CA
🥇 Banner finds
2
Detector(s) used
Explorer II, Compass 77b, Tesoro shadow X2
There's probably a good reason why he aborted/abandoned that effort. The degree of precision needed to wind/make coils, is mind-boggling. A 100th of an inch error in wire length, can spell big differences on depth/performance. And tightnesses of wind, blah blah blah. Such that you need robotic computerized assembly to make them the same and peak.

In the old days (BFO's, etc...) perhaps hobbyists could home-make their detectors and coils. But today, you are simply not going to "make a better mousetrap" than what is being made by the manufacturers.
 

TheHunterGT

Bronze Member
Feb 2, 2015
1,246
1,847
Central California
Detector(s) used
Anfibio Multi - T2 Classic - F75+ - G2+....and MANY more tested and reviewed.
Primary Interest:
All Treasure Hunting
Man....this stuff is extremely cool. I've been a member on GeoTech for a few months and read just about every legit home-made coil and detector post on that forum. I quickly gave up any efforts to make my own coil or detector. Just not worth the time or effort with all the new wave of 200-300 detectors that hit the market in the last 1-2 years and go 10 inches deep.

I would have figured somebody would have coughed up the shipping costs and gave it a whirl. Plenty of people still do it just for the hobby aspect. Awesome stuff...best of luck.
 

haxor

Jr. Member
Aug 23, 2015
94
88
Raleigh, NC
Detector(s) used
NOX 800
Primary Interest:
All Treasure Hunting
At the low freqs, I doubt .01 of an inch would make much diff. A 1/2 have dipole antenna for 14MHz (a lot higher freq/shorter wavelength) is ~32 feet. So the full wavelength of 14MHz is upwards of 64 feet. But that's also why there is an inductance meter in the mix.

There's probably a good reason why he aborted/abandoned that effort. The degree of precision needed to wind/make coils, is mind-boggling. A 100th of an inch error in wire length, can spell big differences on depth/performance. And tightnesses of wind, blah blah blah. Such that you need robotic computerized assembly to make them the same and peak.

In the old days (BFO's, etc...) perhaps hobbyists could home-make their detectors and coils. But today, you are simply not going to "make a better mousetrap" than what is being made by the manufacturers.
 

Rik601

Jr. Member
Oct 23, 2014
57
15
Primary Interest:
All Treasure Hunting
I would also be interested in the winding coil wire and some of the coil forms ! Rick
 

Rik601

Jr. Member
Oct 23, 2014
57
15
Primary Interest:
All Treasure Hunting
It is not that mind boggling if you have a degree in Electronics and a lot of experience like myself ! I noticed a lot of people today think they can perform technical procedures without any training or experience , that's from spending way to much time on the internet !!!!
 

Rik601

Jr. Member
Oct 23, 2014
57
15
Primary Interest:
All Treasure Hunting
Making a coil is not that difficult that's why he had the inductance meter he want to measure the MH of the coil or milli Henry it does not have to be perfect it just has to have the correct inductance or XL then a op amp circuit is usually put in place to amplify the signal and filter any noise !!
 

TimmyOut2c

Tenderfoot
Oct 23, 2015
7
5
CT
Detector(s) used
Discovery 2200 -- I know, I know.... but it was free!
Primary Interest:
All Treasure Hunting
OP
OP
BamofNH

BamofNH

Jr. Member
Aug 20, 2007
50
4
Chester, New Hampshire
Detector(s) used
Minelab Explorer SE Pro, Tesoro Conqistador umax, Fisher F75
Primary Interest:
Metal Detecting
This turned into an interesting thread. I apologize for not checking in any sooner. Everything has been spoken for. Nice to see there are a lot of you out there still ready to take on new challenges. And when succeed you will be proud of your accomplishment. Thank you all.
 

OBN

Gold Member
Dec 30, 2008
6,528
7,009
Maryland Waters
🏆 Honorable Mentions:
1
Detector(s) used
"Excalibur"..
"AQ" Impulse
Primary Interest:
Other
Charles OK? I did not know him personally but he did some great work... If I remember correct he did a Explorer that was far ahead of it's time. More of a furture CTX I would have said...
 

Last edited:

CharlesUpstateNY

Sr. Member
Nov 13, 2015
263
305
Primary Interest:
All Treasure Hunting
So how difficult is it to make your own coil for an Explorer? Here's a brain dump of what I learned. The electronics is not that difficult, it is the assembly of the coil components that can be annoying.

Minelab Explorer coils are fairly basic, they consist of simply magnet wire, epoxy, a plastic shell, electrostatic shielding paint, and a coil wire to plug it in. That's it. There are no chips in Explorer coils like there are in Minelab Sovereigns and Excaliburs. The difficulty is in the assembly of these components and when you dissect various Minelab and aftermarket coils you see how they have struggled with this and have employed various methods.

Coil Shell - You will need a tough plastic shell made of ABS plastic. ABS is ideal because it can take a real beating and is cut resistant. There was only one supplier of shells when I was making coils and he didn't really offer the size/shapes I was looking for so I ended up making my own. I built a vacuum thermoforming machine and as you can see from Bruce picture a number of wood molds. The difficult part of making your own shells is first you need a CNC mill or router to make the molds and second once you mold the shell you need to cut away the excess plastic, ABS being cut resistant doesn't want to be cut. I ended up building a crude horizontal band saw and running the molded shells through like cutting meat on a meat slicer, it worked actually quite well and slice off the shell from the waste part of the sheet. There are a number of tricks and issues related to thermoforming but that's a topic in itself for another day.

Coil Windings - There are two magnet wire windings in each coil, a transmit winding TX and a receive winding RX. For the Explorer the TX winding is fairly basic, its pretty thick gauge wire and a modest number of turns. Minelab uses Litz stranded magnet wire but most aftermarket coils just use solid. The RX winding uses far finer gauge wire and a lot more turns. You don't want to wind them super tight, a bit loose is fine. For a given size coil the number of turns for each will vary, you have to figure out how many turns of a given gauge wire you need and so there is some experimentation each time you design a new coil to figure out which wire to use and the number of turns. I measured quite a number of Minelab and aftermarket coils to establish the specs and a range for each. Some of these specs play tug-o-war with each other. You have inductance, capacitance, resistance, and Q. What you will find is that when using a particular gauge magnet wire all these measurements will come into alignment with the established range, a gauge higher or lower and they go out of whack. For the RX winding even a half gauge is sometimes enough to knock it out of spec hence I had quite a number of different gauges on hand for RX.

On a side note I would love to discuss Resistance vs Impedance with someone who has a degree in electronics.

Coil Cable - This is part of the circuit, the cable will add resistance and capacitance you have to take into account. The problem is Minelab uses a custom cable I wasn't able to source. It has two conductors, each individually shielded, with the TX being a thicker gauge. I ended up having a company manufacture a batch of coil cables for me.

Shielding Paint - Many shielding paints are actually too conductive the Explorer can detect them, you need to use carbon black.

Epoxy - Stick with epoxy I have tried various urethanes bad idea. You want a good pourable epoxy that won't distort as it cures. You want a slow cure not something that sets up in seconds.

Assembly - This is where you can end up pulling your hair out. First the coil needs to be completely covered in shielding paint, yet this shielding paint needs to be completely sealed in epoxy. If the shielding paint touches say some grass you will get a false signal. You can't just apply the paint to the bare windings. Pretty quickly you come to realize that you have to build an inner coil, apply the shielding paint to that, then encase that in an outer shell. This is in fact how many of the earlier coils are made.

The original Explorer I and II coils have an inner plastic shell, the windings are encased in epoxy, then shielding paint is applied, then this inner coil is suspended on some foam inside the larger outer clam shell which is glued together. This shell has a lot of air space in it, and its not waterproof there are pin holes, which is why if you dunk it in salt water too many times at the beach water gets inside and the machine falses like crazy. At a minimum the coil will not be usable until it dries out, frequently this would ruin the coil altogether. Some lightweight aftermarket coils routed out a foam core, epoxied the windings in the foam, covered this with paper that had shielding paint applied, then encased this in an outer ABS shell. Shielding is one of the more annoying issues when it comes to building coils.

Aligning the windings. The Explorer uses a balanced DD coil, you connect the coil to an oscilloscope with a signal running through it, you can use the Explorer as your signal source. A two channel scope is all you need, one for TX and one for RX. You overlap the two windings of a DD coil down the center while watching the signal induced on the RX winding. As you nudge the amount of overlap you can watch the signal induced on RX get smaller and smaller until when you have them overlapped just right the signal induced on RX will be basically zero, a flat line on the scope vs the square wave TX is transmitting e.g. the square wave induced on RX gets smaller and smaller until its basically a flat line. You will do your victory dance the first time you balance a coil, then comes the hard part, holding it in that position until the epoxy cures. Just a nudge is enough to knock the windings out of alignment and is probably what a poster above is referring too when he says .010 is enough to knock things out of whack. There's nothing quite like the gut punch of discovering your windings were pulled out of whack by the epoxy curing ruining the coil you just spent all that time building. In measuring quite a few Minelab and aftermarket coils most are in perfect alignment but some were out a bit. Still for best depth and performance I felt perfect alignment should be the goal.

So there's a sample of some of the things you will face constructing your own coils. Its not impossible but it can be a chore. I would not waste my time today building a coil that was already available for purchase. The latest Minelab SE Pro coil is a work of art when you consider how slim the coil is constructed, my hats off to Minelab on that coil and it performs awesome I have dug a boat load of coins and jewelry with that coil.

But there are some areas of coil design worth pursuing. First if you want to build a lightweight version of an existing coil. Manufactures build coils to last, to limit returns. If you have ever used a 15" WOT coil its an awesome coil performance wise but its so heavy the weight will destroy your arm. So you might build yourself a lightweight version of this coil using say a foam core instead of solid epoxy. Knowing it won't last as long as a WOT, it will be more susceptible to falsing if you bump it on something but the weight savings would be worth it.

Another area is coils designed for depth. Is it the coils length front to back that equals depth or the coil's width? There's no reason a coil has to be round. There are lots of oval coils but those are designed to provide more coverage per swing not more depth. I once build a coil that was only 12 inches long, but 18 inches wide for increased depth.

Finally all the coils I'm aware of for the Explorer are DD coils, but the Explorer only requires that the coil be balanced between RX and TX. There is a concentric coil design that is balanced using 3 windings, sort of. It has a normal TX winding, then a middle RX winding, then a smaller center RX winding that's wound in reverse, get this just right and the coil will balance on the scope just like a DD coil. Its not an easy coil to build so why bother? Because it creates a cone shaped detection field vs the longer DD field. I once build one of these coils and tested it in a trashy park we had beat to death with Explorers. This thing locked onto an indian head cent solid, clean, just bang every time I swept it. It wasn't super deep, maybe 6 inches. What amazed me was when I dug the plug and the sheer number of trash targets that were embedded in the plug above it. The cone shape had sniped right in between several trash targets and locked onto this thing. There are limitations with this type of coil and the Explorer, this concentric coil beyond a certain size will send the Explorer a much larger ground signal that's one of the reasons why Explorer DD coils are better in bad ground they gulp less of it, just a strip of ground down the center vs a big circular cone of ground like a concentric. But for say 10 inches or less this type of concentric coil might produce some good finds in high trash areas.
 

RobRieman

Silver Member
Nov 12, 2012
3,282
1,915
Cincinnati Ohio
🏆 Honorable Mentions:
3
Detector(s) used
White's V3i / Minelab E-trac
Primary Interest:
Metal Detecting
Impressive stuff Charles. I would love to have watched you make a coil. Very nice accomplishment!
 

OBN

Gold Member
Dec 30, 2008
6,528
7,009
Maryland Waters
🏆 Honorable Mentions:
1
Detector(s) used
"Excalibur"..
"AQ" Impulse
Primary Interest:
Other
Impressive stuff Charles. I would love to have watched you make a coil. Very nice accomplishment!

Even more impressive from Charles and from many years ago before the CTX was even on the boards..

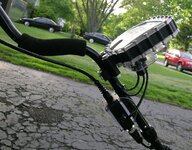
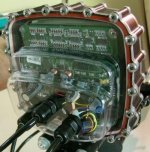
OBN0388.jpg addon (2).jpg
 

RobRieman

Silver Member
Nov 12, 2012
3,282
1,915
Cincinnati Ohio
🏆 Honorable Mentions:
3
Detector(s) used
White's V3i / Minelab E-trac
Primary Interest:
Metal Detecting
Even more impressive from Charles and from many years ago before the CTX was even on the boards..

View attachment 1235752 View attachment 1235753

That is awesome OBN! A hobby within a hobby. I can only imagine the one offs he has made during his life. Did he work/with someone who engineered detectors or did he just do this because he could?
 

Top Member Reactions

Users who are viewing this thread

Top