AzViper
Bronze Member
- Sep 30, 2012
- 2,038
- 2,250
- Detector(s) used
- Fisher Gold Bug Pro, Nokta FORS Gold, Garrett ATX, Sun Ray Gold Pro Headphones, Royal Pick, Etc.
- Primary Interest:
- Prospecting
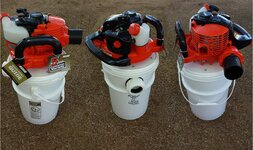
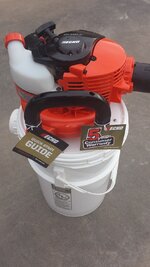
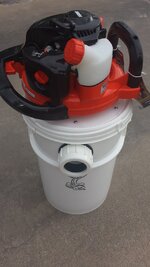
The Viper-Vac is without question the best built gold sucking vacuum on the market today. There is not another gas vacuum that is 100 percent sealed nor can others make that claim, but the Viper-Vac can, as its seal out to the crevices tool. The over the counter parts to build the Viper-Vac is about $300.00 and you will have a better built gas vacuum then any of the others currently on the market. For anyone looking to buy a Vac / Blower I would recommend that you build before you buy. First and foremost you will get the satisfaction that you built it and your wallet will thank you as you will save some dollars and have a much better product than you can buy. Its built to deliver the maximum suction power due to being completely sealed system, the key is making sure you have no leaks. Using the O-Ring, blower seal around the base, and compression inlet you can build a leak free vacuum. Below is everything I used to build this vac. I looked at every gas blower on the market and the Echo PB-255 offered the best and most secured way to mount and seal the gas blower to a reinforced lid. The links below are what you need to build a Viper-Vac. Viper-Vac Kits or complete Viper-Vac's are no longer available from me. If you should have questions on building a Viper-Vac you can PM me.
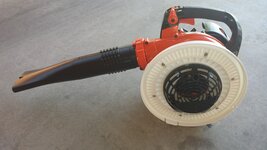
Blower: Echo PB-255LN – Why? It gives you the best opportunity to bolt the blower to your lid with three mounting screws plus it is much quieter than others on the market. Nearly 400 CFM. Echo Power Blower PB-255
6 Gallon Bucket with 1/4 turn twist lid: Screw Top Pails by BWAY - Storage Pails and Buckets by Zoro Tools Industrial Supplies
Part Number - O-RPD-G3327 - ID 2.75” - OD 3.0” of the inner grove. Not the outer diameter of the O-ring. - GD 5/64” Fits the bucket perfect. Large Rubber Grommets for Desktops, Server Enclosures and Cabinets
2.5” x 8’ Hose and Crevice adapter: Loews or Home Depot - VAC HOSE
Bulkheads to make your lid stronger: I bought two cheapo 12” wide x 5/16” nylon cutting boards from Wal-Mart.
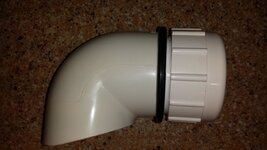
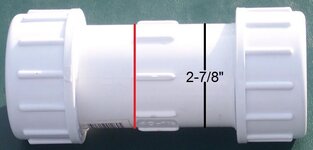
The 2.5" elbow will need to be purchased at a local plumbing supply shop such as Ferguson Plumbing Supply. HD and Lowes do not sell anything larger than 2" Also when buying the compression coupling it needs to have an OD as shown below. HD in my area sells the size needed, but all HD's have different suppliers.
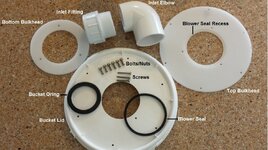
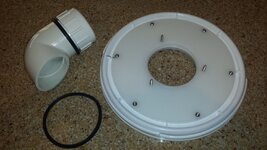
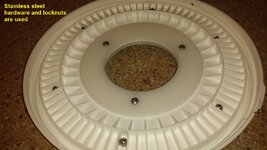
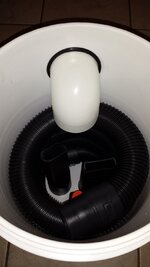
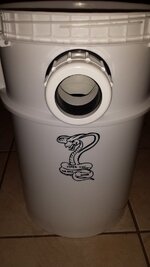
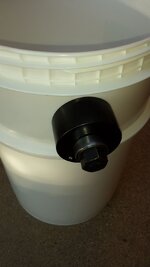
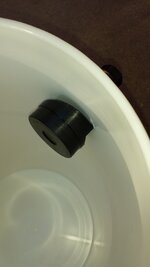
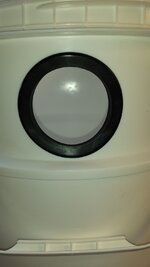
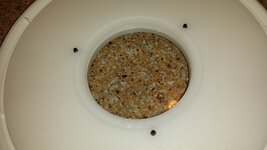
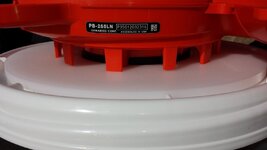
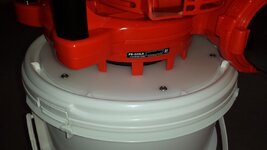
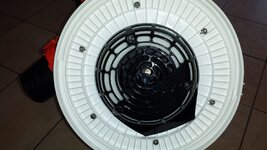
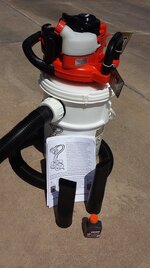
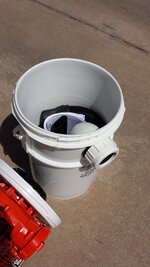
The first photo shows the entire parts used to build the Viper-Vac, the second photo shows the lid assembled, and the third photo shows the improved inlet allowing more room within the bucket for additional gear inside the bucket once the lid is in the locked position. Photo four shows the backside of the lid. I use a reinforced lid unlike other vac's that use a press on lid. This lid allows the lid to turn 1/4 turn and lock onto the bucket.
The six machine screws and lock nuts are 10/32 thread size and stainless steel. There are 11 spaces on the backside of the lid between the machine screws that are evenly spaced out.
I used Silicon Seal between the lid and the top bulkhead. I used clear and use enough so that once you bolt the lid and bulkheads together that the Silicon Seal squeezes from the outer edge and the inner hole. Allow to dry and take a sharp razor blade to remove the dried Silicone seal as it will not stick to the lid or the bulkhead but will make an airtight seal.
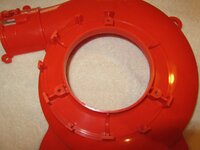
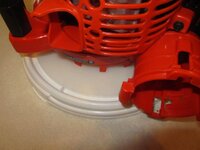
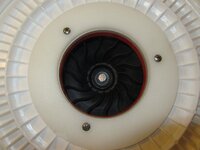
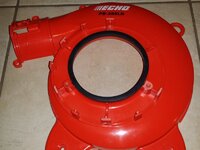
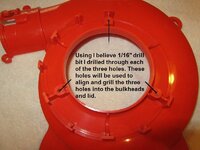
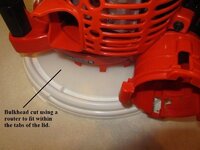
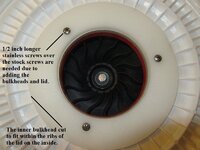
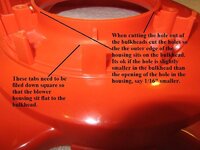
Here you can see the three mounting holes. Once the blower housing was separated I used a small drill bit drilled through the three holes into the inside of the blower housing. The reason I did this was it made it very easy to transfer these holes on the lid/bulkheads once the blower was centered on the lid. I used a router to cut out the lid but it could be cut with a razor blade. In fact I cut the bulkheads and lid at the same time with the router. The second photo shows the outer bulkhead. It is made from 1/4" cutting board from Wal-Mart. The reason I used the bulkheads is to stiffen up the lid as the stock lid will break. The third photo shows the inner bulkhead. Again both bulkheads and lid were cut using a router. Using a caliper I was able to measure the blower intake opening and cut the hole to the correct size. This intake opening will need to have the rubber O ring stretched over and onto the edge for the seal against the bulkhead.
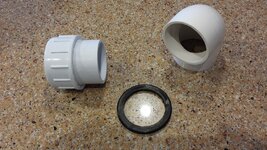
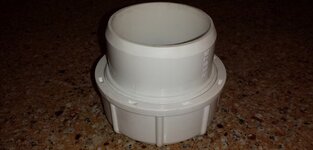
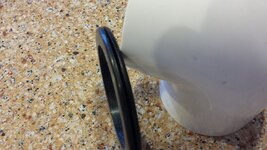
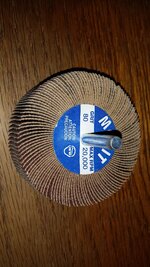
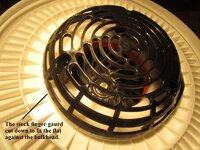
Using the stock intake guard I was able to cut the guard down so it sits flat to the bulkhead. Here are photos of the O ring, compression coupling, and 90 degree elbow. As you can see I have cut the compression coupling in half. With the many different brands of compression fittings you will need to make sure the OD of the center section of the compression fitting is larger than the ID of the 2.5" 90 degree elbow. You will need to use a sanding disc or Dremel tool to enlarge the ID of the elbow to fit the compression coupling fitting that I have cut in half.
Some of you are confused in locating the compression fitting I used. You need to purchase a 2 inch PVC compression coupling. Then cut it in half where I have the red line drawn. If you are going to use a 2.75 inch 90 degree PVC elbow you need to make sure the compression coupling measures AT LEAST 2-7/8" where I have shown in the photo. There are many different brands and some of the compression coupling are smaller and will not fit tight on the elbow. You will need to enlarge the elbow to fit the compression coupling once the coupling has been cut in half. Nobody sells the compressing fitting as I am using it, you need to purchase the entire coupling and cut it.
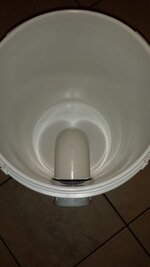
I am now using a 2.5" 90 degree PVC elbow to deflect the paydirt downward. In order for the elbow to fit the compression coupling fitting the inside of the elbow needs to be reamed out to fit the compression coupling fitting that has been cut in half. Once the compression fitting fits the elbow assemble the O ring and compression fitting into the bucket then glue the 90 degree elbow to the compression fitting. You may need to shorten the length of the compression fitting so the compression fitting and 90 degree elbow fits tight up against the O ring on both sides. Many brands of 2" compression fittings are on the market and you will need to find one that the center where you cut the compression fitting in half that the OD is bigger than the ID of the 2.5" 90 degree elbow. Remember even though the elbow size says 2.5" its really closer to 2-7/8" ID. I used a sanding disc to machine the ID of the elbow as seen below. With the use of the elbow I am now raising the compression inlet higher onto the bucket this allowing more paydirt to fill the bucket. Viper-Vac has gone through changes to improve on its design and allow to be used as a vac, drywasher blower, and blower for home use.
The hole in the bucket will need to be slightly bigger than 3 inches. Its best if you have a sanding disc pictured as you can use the disc to ream out the hole while getting a very smooth round finish. I use a knockout punch to cut a 3 inch hole then ream the hole with the sanding disc. To get the compression fitting to push into the O ring. I tapered the edge at a 45 degree angle as seen above and used a soapy solution of water and soap to work the fitting into the O ring after the O ring has been installed into the bucket. If the fitting does not fit into the O ring use the sanding disk to enlarge the hole slightly larger.
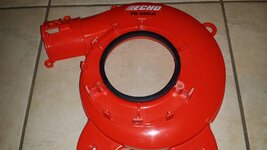
The Viper-Vac continues to evolve into a better built gold sucking vacuum. Below is the latest creation of the Vip-Vac. The outer bulkhead has had a recess area cut into the bulkhead so the flat O ring seal fits into the recess area. Below is the best but I do understand not everyone is going to have the ability to machine the bulkheads as I have, but you can still use the rubber gasket material I have used to place on the edge of the blower. This will still seal to the surface of the bulkhead. I also used 10-24 stainless machines screws with stainless lock nut to secure the bulkhead to the outer edge of the lid.
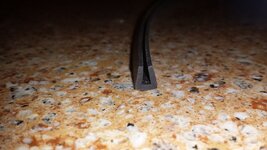
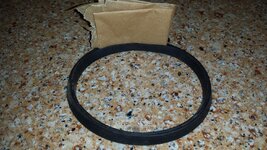
If you do not have the means of cutting a recess area on the bulkhead you still want to use the rubber edge seal as seen below. This can be purchased at any hardware store. The grove opening is about 3/32" wide and 1/4" deep while flat on the bottom side. Cut enough to be slightly smaller when fitted on the blower edge. Remove from the blower and make sure the cuts on each end of the seal are square even cuts. Fold wax paper a number of times and place inside the groove as seen in the picture, this helps align the two edges while gluing the ends together. Now place a very small small amount of super glue to the U shape rubber and bring the two ends together forming a O ring. Hold until the glue dries. Next install the O ring onto the edge of the blower. Now you will be able to mount the blower to the bulkhead and have a sealed blower to the bulkhead. You may need to trim so lightly some of the small tabs so that everything hits flush once the blower is bolted to the lid/bulkheads.
I was out and about today and looked at many gas powered blowers from Stihl, Echo, Husqvarna, Craftsman, Poulan, Hitachi, Homelite, Toro, Ryobi, Makita, Tanka, or Troy-Bilt. Outside of Echo no other brand offers the simplicity of mounting advantages of the Echo PB-255.
Now I am not going to say that I or someone else cannot make other Gas Blowers work cause I know I can, but I know that within 2 hours of having either of the two Echo models in my hands I can have a complete Viper-Vac built and ready for service. No other gas blower including other models made by Echo offer these advantages of mounting the blower housing to the lid of a 6 gallon bucket.
The question has been ask as to how the blower housing attaches to the lid. Once you have the housing removed from the blower, this is the housing section that has the finger guard installed. Place the housing so that the three screw holes are facing upwards. Next use a drill bit that fits the screws holes but does not remove any of the plastic of the holes on the sides of the holes. What your going to be doing is drilling through the housing so that you can use these three holes as drill guides.
Hopefully you have made your 1/4" cutting board bulkheads for the inside of the lid and the topside of the lid and have cut the center hole slightly smaller that the OD hole of the blower housing as you want the blower housing to rest on the 1/4" bulkhead. Now place the 1/4" bulkhead housing on a wood surface that you can afford to drill into. Next place the blower housing down onto the bulkhead. Align the blower housing with the bulkhead so that the holes of the bulkhead and the blower housing are perfectly aligned. Next take your drill and drill through the blower hosing through the 1/4" bulkhead. Once you have one of the bulkheads drilled you can now use this bulkhead as your drilling template to drill the other bulkhead. Next you can take the top bulkhead and center it on the bucket lid and mark where you need to cut the hole and drill the holes.
Next you will need to enlarge these three holes in the bulkheads and lid ONLY so that the screws will easily pass through the bulkheads. These screws will attach all the components in this order, finger guard, inside bulkhead, lid, outside bulkhead, then screw into the Echo blower housing. This is why you need new screws that are 1/2" longer. Now once you have the components screwed together look to the inside of the blower housing and make sure that the screws are flush to the plastic blower housing. If they are sticking out you will need to remove each screw one at a time an slightly file or grind the screw down. If you don't the screws will come in contact with the fan blade once you assemble the blower housing with its other half of the blower housing containing the fan and motor.
To put the entire assemble together with the cut-down finger guard you will need to go to the hardware store and buy three new screws of matching thread design about 1/2" longer. Assemble the components just as you took the finger guard off with the exception of installing the bulkheads, lid and blower housing.
Hopefully this all makes sense once you have all the components in front of you. I know its sounds like an undertaking but its very simple. Once its assembled you have simply the best Vac on the market, better than anything you can buy cause all the other Vac's (Keene, Jobe, Royal, Vac-Pac, Arizona Gold, Etc.) that I know of have not taken these steps nor use the Echo PB-255 blower, 6 gallon sealed screw on lid, sealed intake fitting, sealed blower, 1/4" bulkheads on either side to secure the blower motor to the lid, and a large 90 degree elbow to deflect the paydirt downward.
Last edited:
