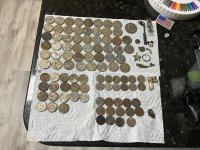
What do ya think? Just glue it back together? F-75

Tnmountains

Super Moderator
Staff member
Jan 27, 2009
18,716
11,709
South East Tennessee on Ga, Ala line
🥇 Banner finds
1
Detector(s) used
Tesoro Conquistador freq shift
Fisher F75
Garrett AT-Pro
Garet carrot
Neodymium magnets
5' Probe
Primary Interest:
All Treasure Hunting
No idea how it happened. Went to check the battery strength for a hunt Saturday morn. The head had fallen off. I am the only person in my basement. The break is plastic. It appears to just be a very thin piece that holds the display on to the handle.
Epoxy it? :dontknow:

photo.JPG

photo copy 3.JPG
 

Last edited:
Upvote 0

BryanM362

Hero Member
Mar 22, 2013
870
426
Cincinnati, OH
🏆 Honorable Mentions:
1
Detector(s) used
E-Trac with Sun Ray probe, Garrett AT Pro, White's Classic SL, Garret Pro-pointer
Primary Interest:
Metal Detecting
Epoxy might work since there is a male and female part. I would try to get some kind of mechanical fastener on it too, if you can.

A screw, wire, or a zip tie, something...
 

OP
OP
Tnmountains

Tnmountains

Super Moderator
Staff member
Jan 27, 2009
18,716
11,709
South East Tennessee on Ga, Ala line
🥇 Banner finds
1
Detector(s) used
Tesoro Conquistador freq shift
Fisher F75
Garrett AT-Pro
Garet carrot
Neodymium magnets
5' Probe
Primary Interest:
All Treasure Hunting
Thanks Bryan. I wonder if Fisher has schematics and a parts list? If not I might just glue it. Glad I kept my other machines!
 

luvsdux

Bronze Member
May 16, 2007
1,767
690
Lewiston, Idaho
Detector(s) used
Multiple Tesoros and Whites
Primary Interest:
Metal Detecting
I've had good luck with epoxy on several repairs so that's what I'd try. Good Luck.
luvsdux
 

Bart@Big Boys Hobbies

Supporting Vendor
Supporting Vendor
Jul 24, 2005
4,594
1,219
Moore Oklahoma
Detector(s) used
Call for your Treasurenet special discount! Be sure to mention Tnet when you call!
Primary Interest:
Metal Detecting
Fisher has a 5 year warranty. Did you call them?
 

Rawhide

Silver Member
Nov 17, 2010
3,590
2,185
SouthWestern USA
Detector(s) used
Nox 800, Etrac, F75, AT Pro. Last two for sale.
Primary Interest:
All Treasure Hunting
Bart said it first. Give Fisher a call.
 

BryanM362

Hero Member
Mar 22, 2013
870
426
Cincinnati, OH
🏆 Honorable Mentions:
1
Detector(s) used
E-Trac with Sun Ray probe, Garrett AT Pro, White's Classic SL, Garret Pro-pointer
Primary Interest:
Metal Detecting
It does look like that part is replaceable. Getting a new one would be your best bet.
 

OP
OP
Tnmountains

Tnmountains

Super Moderator
Staff member
Jan 27, 2009
18,716
11,709
South East Tennessee on Ga, Ala line
🥇 Banner finds
1
Detector(s) used
Tesoro Conquistador freq shift
Fisher F75
Garrett AT-Pro
Garet carrot
Neodymium magnets
5' Probe
Primary Interest:
All Treasure Hunting
Thanks everyone. It is a small piece of plastic that holds the unit to the frame that broke. I am still trying to figure out what caused it to break and when it broke. Maybe to much pumping up and down ground balancing eh??
I am going to see if they will send me the parts for the repair depending upon their back log.
Good hunting everyone.
 

pkb

Hero Member
Feb 10, 2013
587
316
Dallas
Detector(s) used
Two Garrett AT PRO's, two Garrett pro pointers
Primary Interest:
All Treasure Hunting
gorilla glue
 

cudamark

Gold Member
Top Banner Poster
Mar 16, 2011
13,223
14,551
San Diego
🥇 Banner finds
1
🏆 Honorable Mentions:
3
Detector(s) used
XP Deus 2, Equinox 800/900, Fisher Impulse AQ, E-Trac, 3 Excal 1000's, White's TM808, VibraProbe, 15" NEL Attack, Mi6, Steath 920ix and 720i scoops, TRX, etc....
Primary Interest:
All Treasure Hunting
Looks like a poor design to me.....
 

DDancer

Bronze Member
Mar 25, 2014
2,339
2,002
Traveling US to work
Detector(s) used
Current Equinox 600
Past Whites DFX Garret GTI 2500 and others
Prospecting Minelab GPZ 7000
Past SD 2100 GP 3000 (retired)
Primary Interest:
All Treasure Hunting
If you cant find replacement parts and the detector is working fine and Idea you might try if your inclined to do a bit of tin bending... you can get these materials from and Ace Hardware store. Basically your going to build a brace and epoxy it together. Tools a hammer, file, pliers, hack saw or metal shears, and a screwdriver should be sufficient. A c-clamp of at least 6 inches is also desirable but a brace can be jerry rigged and tape used for aligning and mounting the monitor to the brace.

If you do this its at your own risk. This is simply an idea and something I would try if faced with the same problem.


remove about 1 inch of the foam from the handle, get yourself a hose clamp, a piece of aluminum or brass stock as wide as the handles diameter 1/8 inch thick at least 6 inches long, an epoxy or gorilla glue, a little sand paper and some electrical tape.

Your removing the foam on the handle to provide an area for the base of the brace and the hose clamp to be mounted. Clean the exposed area with the sandpaper as you will be appling your adhesive here later to anchor the brace to the handle. The hose clamp will also remain here as well.

Form the brace from your piece of metal stock. Cut the stock so that you have 1 inch covering the handle shaft and at least 2 to 3 inches, in all about 4 inches long, to run up the back of the detector screens back. Using the hammer or pliers place a slight Z bend at the point on the brace were it transitions from the handle to the back of the monitor. This may take a couple of tries and most small metal stock usually comes in 12 inch pieces so you should have 3 tries. Make this bend as close as possible to the natural resting place of the monitor on the handle as possible.

Once the brace is formed use your file and knock off any shape edges and slightly round the lower brace edges where it will be clamped to help accommodate the clamp.
Scuff the metal where it meets the handle and monitor faces, scuff the monitor face were it meets the brace. You should have already scuffed the handle shaft. Reason for the scuffing is to help the epoxy or adhesive tack the surfaces together better.

Now comes the tricky part. Mounting the brace and aligning the monitor.

Set the brace and the clamp onto the handle and slightly tighten the clamp but just enough so you can adjust it left to right. Set the monitor were it would mount on the handle and adjust the brace so its flat to the monitor. With a pencil, pen or scribe hold this in place and mark were the brace will be on the back of the monitor.
At this point if you have the 6 inch c-clamp its a bit easier to mount the brace solidly to the monitor. But I'll go over procedure A, without clam, first.

Procedure A : Get a couple of heavy books, phone books would be best, these will be used as a face surface for your monitor and a weight for pressing the brace while the epoxy or adhesive sets. Set the monitor face down on the first book. Get your electrical tape ready by applying it to the back of the brace in a solid sheet from where the bend is to the top of the brace. The sheet should be at least 3 inches wide. This will hold the brace in position and keep the epoxy from glueing you book to the back of the detector. Apply the epoxy/adhesive to the brace and to the area you outlined on the back of the monitor. Don't use gobs of it just a light coating will do. Now set the brace where you outlined it on the monitor, align it if necessary, and when positioned press the brace down firmly and press the tape down firmly. Now carefully place the other heavy book over the brace on the back of the monitor and let it set for at least 8 hours. Make sure the other book is pressing on the brace, a couple of pieces of card board on top of the brace will help if there is a gap when you lay the book down.

Procedure B : Much like procedure a instead use a c-clamp to apply pressure to the brace until the epoxy/adhesive has set for at least 8 hours. Using a c-clamp you will need to use a pad on the brace, a small piece of card board, and you will need to use a thin board, if you have any stock left and its wide enough to cross the monitor face, or at worst at least a couple of pieces of card board to cover the face of the monitor where the other side of the c-clamp will contact the monitor.
Using procedure A and having stuck the brace to the back of the monitor and setting it with tape place a small piece of cardboard were the c-clamp will contact the brace. Place your padding or brace across the front of the monitor and position the c-clamp then tighten. Don't tighten to far, just enough to give the brace a firm pressure.

Now wait.

After your wait the brace should be mounted to the monitor. Test this a bit, stress it, and make sure the brace does not come off. If it does then the adhesive used probably wont work and you can try another. If it stresses and does not break move on to the next step. When using a different adhesive you will have to clean the old adhesive off first.

Mounting the monitor:

Apply your epoxy/adhesive to the base of the brace and the break point between the monitor and handle. You can go a little heavy on the epoxy/adhesive as this will add extra bulk to the weld. With the hose clamp in place slide the parts together, align and then tighten the hose clamp firmly. Wait 8 hours for the parts to set up. Your monitor should now be in good shape.
Using your electrical tape wrap layers around the hose clamp to pretty it up and prevent it from being uncomfortable.

If the monitor breaks free again you can re-attach it or ask me and I can give you a couple of other ways to re-inforce the brace.

using ruffly the same procedure you can also install a couple of side braces to the underside of the monitor as reinforcement. However these can be installed after the back brace is built and provide you can get the hose clamp back off after every thing is set. A little tape between the back brace epoxy/glue and the clamp when you mount the monitor should help you remove the clamp later if you opt for side braces.

Luck to ya.

Thanks for reading.
 

Last edited:
Aug 20, 2009
12,824
7,899
New Hampshire
Detector(s) used
Garret Master hunter Cx Plus
Primary Interest:
Other
Use automotive goop.It dries a little flexible.I used it on the grill of my van that surrounds the headlights.It held for 3 years until I junked the van.If it held the grill together with all the jarring from the crap roads in Mass.It will hold that with ease.
 

OP
OP
Tnmountains

Tnmountains

Super Moderator
Staff member
Jan 27, 2009
18,716
11,709
South East Tennessee on Ga, Ala line
🥇 Banner finds
1
Detector(s) used
Tesoro Conquistador freq shift
Fisher F75
Garrett AT-Pro
Garet carrot
Neodymium magnets
5' Probe
Primary Interest:
All Treasure Hunting
Got it back today. I shipped it to El Paso and USPS sent it from Tennessee to Washington State above Oregon then back down to Texas ! Anyways they put it back together. I may look at adding some type of brace. I have a habit of leaning the detector agains me as I dig and it does fall over on occasion. It is not chattering like it was and pulled up some deep iron and a mangled enfield bullet on a test run in my yard. I dig the deep iron as I get a lot of canister shot here.
Thanks Fisher Labs and for all the great ideas and responses.
HH
TnMtns
 

Keppy

Gold Member
Nov 19, 2006
8,318
2,870
N.E. Ohio on lake Erie
Detector(s) used
** WHAT ONE I FEEL LIKE ON HUNTING DAY *****
Primary Interest:
Other
Got it back today. I shipped it to El Paso and USPS sent it from Tennessee to Washington State above Oregon then back down to Texas ! Anyways they put it back together. I may look at adding some type of brace. I have a habit of leaning the detector agains me as I dig and it does fall over on occasion. It is not chattering like it was and pulled up some deep iron and a mangled enfield bullet on a test run in my yard. I dig the deep iron as I get a lot of canister shot here.
Thanks Fisher Labs and for all the great ideas and responses.
HH
TnMtns
…..:thumbsup:
 

VOL1266-X

Gold Member
Jan 10, 2007
5,589
2,909
Northern Middle Tennessee
Detector(s) used
Fisher 1266-X, F75 X 2
Primary Interest:
Relic Hunting
Got it back today. I shipped it to El Paso and USPS sent it from Tennessee to Washington State above Oregon then back down to Texas ! Anyways they put it back together. I may look at adding some type of brace. I have a habit of leaning the detector agains me as I dig and it does fall over on occasion. It is not chattering like it was and pulled up some deep iron and a mangled enfield bullet on a test run in my yard. I dig the deep iron as I get a lot of canister shot here.
Thanks Fisher Labs and for all the great ideas and responses.
HH
TnMtns
Fisher Labs has been very good to the Tennesee Trio Richard. Glad they got you back in the saddle. More Enfields await you there. HH, Q.


DirtDiggerDaveinMD

Hero Member
Jan 31, 2005
638
730
Got it back today. I shipped it to El Paso and USPS sent it from Tennessee to Washington State above Oregon then back down to Texas ! Anyways they put it back together. I may look at adding some type of brace. I have a habit of leaning the detector agains me as I dig and it does fall over on occasion. It is not chattering like it was and pulled up some deep iron and a mangled enfield bullet on a test run in my yard. I dig the deep iron as I get a lot of canister shot here.
Thanks Fisher Labs and for all the great ideas and responses.
HH
TnMtns

I'm glad you got your Fisher back!
 

OP
OP
Tnmountains

Tnmountains

Super Moderator
Staff member
Jan 27, 2009
18,716
11,709
South East Tennessee on Ga, Ala line
🥇 Banner finds
1
Detector(s) used
Tesoro Conquistador freq shift
Fisher F75
Garrett AT-Pro
Garet carrot
Neodymium magnets
5' Probe
Primary Interest:
All Treasure Hunting
I am glad too. So what do I do put it in the truck and ended up looking for arrowheads in some fresh plowed fields! Thanks guys!
 

Top Member Reactions

Users who are viewing this thread

Top