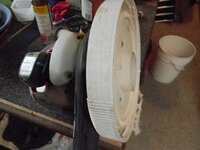
budget diy CracVac/ blower under $100

2cmorau

Bronze Member
Nov 8, 2010
1,608
1,294
Camptonville, CA
Detector(s) used
GMT&GM3 Whites MXT Pro, Shadow X5, Fisher 1280, OMG and the TDI
Primary Interest:
Prospecting
DSCN0340.JPGDSCN0341.JPGDSCN0396.JPG

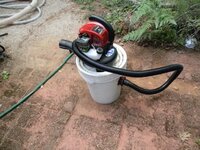
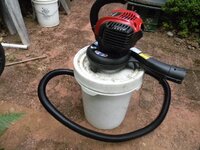
easy enough to put together, i did this in about an hour for less then a $100
Murrey leaf blower 25cc
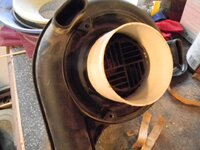
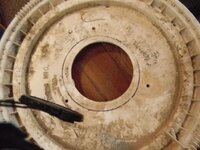
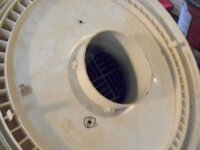
cut a 4" hole on the lid, 4"thin wall pvc pipe about 4" fits snugglyon the lid, remove the protective plate from the intake on the leaf blower, snaps off
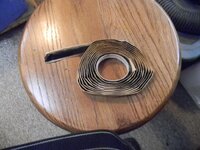
I used Butyl windsheild tape, but any double sided tape will do, placed on the edge of the pvc pipe and squeeezed the blower on the pipe
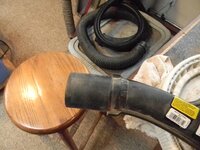
cut a hole on the side of the bucket for the vacuum hose 2 1/2" and ABS Elbow for the inside
got yourself a new CracVac
 

Can you please add a pic showing the PVC pipe? ...I can't quite visualize it.
 

ok, give me a day or two, kinda of a mad house right now, happy TG all
 

If your blower is the one I think it is, you can add some 1" angle brackets to the feet on it and bolt through the lid with some big fender washers for more stability. Helps a bunch if you're like me out in the field. I think it's called the DROPSIES.
 

Boogey thnaks for bringing that up, don't need any angle brackets, once you remove the guard plate (snaps off)on the intake, from bottom of this blower there are three screws holding a screen in place for the fan, i remove these screws keeping the screen in place, secure your 4" PVC tube to this screen with 1/4 x 1/2 butyl double sided tape, ( will have picture for this too, like the gray sealant tape used on RVs like roof vents)once it was in place on the lid
i used three 1 1/2" #10x24, punch or drill three holes in the lid, making sure your lined up with the holes on the blower, what is sweet the two legs sit flush on the lid and the nozzle blower rests on the lids edge, making it nice and solid,
but it is top heavy like all the others i have used, large rock or a 2 gallon ziplock filled with dirt to keep it from falling over works, LOL
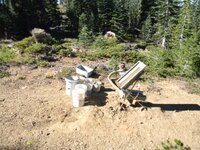
and when i was using it on the drywasher, i found i needed to keep the lid a little cocked to one side of the top of the bucket to allow for full air flow, but overall works great on bedrock and running the washer
Cool! sounds like it'll last. Nice job!!:thumbsup: If you've got a spare bucket, drill some 1" or bigger holes in the sides drop a rock in it and use that for a base when drywashing works excellent! Cool thing is it only weighs a little more. I was doing the half on the bucket thing, Got frustrating having to go set it askew again every four or five minutes. Again Nice job! Looks better than 3/4 of the commercial vac packs out there!
 

Just drill another hole in the lid top, a small one. Then check flow and enlarge the hole to allow the air to flow freely and release back pressure. If you start small then enlarge you custom fit the exhaust flow to your blower capacity. Nice fab job and I'll bet that $400 or so you saved will make your wallet happier :occasion14: Have a great Thanksgiving-John
 

not a bad idea, John, just drill a large hole and use a slide plate, or stack a bunch of rock or branches to keep the fan off the ground guess would work tooDSCN0432.JPGDSCN0433.JPGDSCN0434.JPG
 

DSCN0437.JPGDSCN0436.JPGDSCN0435.JPG need more pics let me know, i added a adaptor on the blower to help with securing the blower hose
 

Top Member Reactions

Users who are viewing this thread

Back
Top