The Metal has a Memory
OK so here is the way this last cookie became a Barber Dime.This coin had been soaking in a mild solution of the Sodium Carbonate ( Soda Ash) Approximately 5 percent solution. I would say that it had been in there for the last 21 days before I even tried working with it.
The first Electrolysis treatment lasted approximately 45 minutes. I checked it every fifteen minutes during this time.
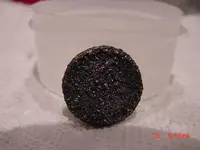
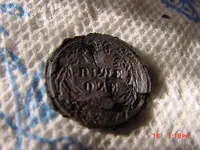
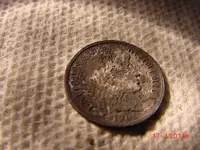
I visually checked the coin for any sign of the crust comming off especially around the edges. I also use a fine aluminum pick with a very sharp point ( Needle Like) To probe the crust. At this time no actually peeling or penetration was noted. I also did not place the coin back in the solution between treatments but instead just distilled water. The coin is always rinsed thouroughly between treatments with fresh water. Please see first picture.
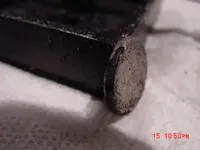
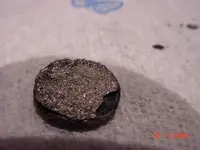
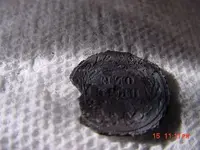
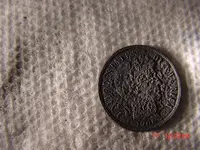
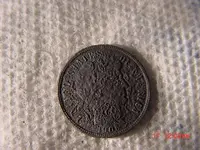
The next day I put the coin back into the Electrolysis for fifteen minutes. I use the timer on this so it is very exact. I pulled the coin out and you can see after the rinse in the second picture at the beginning of this topic and the third picture.
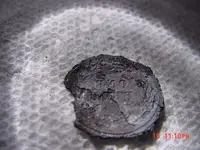
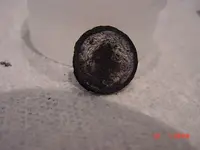
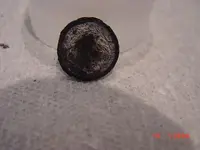
At this time I used the pick to carefully start to remove anything that will move easily off the surface of the coin. I worked on this for approximately 15 minutes until the first surface came off almost full on the back of the coin. Also note the pictures of the piece that came off with the full impression of the coin in it. There was one small piece that I removed a little later after some prodding and then I overlayed it on the piece to give the full reverse of the coin. These are the second set of pictures in Reply #1 and the first picture in reply # 2. I then left the coin in the water for the night.
After letting it soak all night in the water I decided to dry this coin out and then soak it in WD 40 for the rest of the day.These are the second and third pictures in Reply #2.
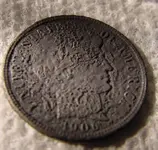
I then used the electrolysis for the third time. The coin had soaked for about six hours in the WD 40 and I put it in the Electrolysis for about five minutes and then checked it. I pulled it out and rinsed it off and the second half or front of the coin came off in one piece with no picking at all. YAHOO. Please see Reply # 4 Pictures.
Well now we had a coin that is in great shape and appears stable. Its Saturday and I feel like working with it a little to see if I can get the rest of the crap off it and really start to detail the coin. I also want to see if there is a mint mark. My first objective was to get any loose surface items off the coin so I would not scratch the surface with any of the crust left on it. Please see the pictures in post # 6
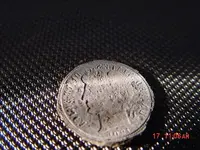
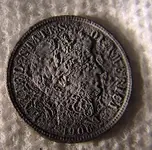
After working with the coins a while I achieved what I thought was a fairly clean surface to start trying to polish or at least see if I could get it to look like silver again. Please see the closeups in post # 9
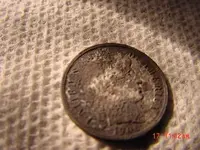
I Tried Everything on this coin to bring up a silver hue but to no avail. I actually damaged it trying to do this. I lightly rubbed it with alcohol and then used some tarnex and this just made the coin blacker. I then tried the alcohol again and used the dremel to try and buff it. This is where the coin deteriorated the first time. I stopped this process and then a brilliant Idea came over me. Why not use the electrolysis to brighten it. Well I put it into the tank with fresh water and set the timer for 3 minutes. I checked it and it was just lightly bubbling so I left it in for two more minutes. Five Total. Well the coin got worse and the color did not change. We actually lost all the detail of the reeded edge that was perfect before and the front letters started to diniegrate and the date was almost not visible.
The back suffered as well and more of the worming appeared. The worming as I call it is the way the metal looks when the two corroded surfaces separate and it leaves ridges which are apparent in the close ups. in Reply # 9.
The other thing is that the coin wanted to go into a another delamination of the surface but this time much deeper into it. I am glad I stopped the process after five minutes.
Lets look at another feature of the coin. This is the set of pictures in Reply # 10 These were taken after I had just gotten this side to peel off. If you look at the coin the blue patina on the metal looked out of place to me. It reminded me of the way metal reacts when it is heated up too much. Cylinders in engines do this and then seize up and is called blue heated. I took the pictures to document this. Also remember this is not from the WD 40 because I didn't use it until after this side was off. Was this coin in a fire . Is this why all the cookies are in the water because of a fire. Interesting thought? Maybe RT can shed some light on this.
My final thoughts on this are that the WD worked amazingly well. AF was responsible for this thought when he posted on his experiment that he used Olive Oil. I decided that if the Olive oil gave him good results that the WD should also work. And it did .
The trick to this whole thing is to time your responses and to use the oil. I am convinced of this now. The surfaces have to be separated. We may not achieve these result on every coin depending on how far the corrosion has gone but at least it gives us a better chance. Also Chemical are not the answer in any of the process after words. I should have left the coin as it was and kick myself in the a$$ for not remembering my own words of wisdom. When do we go from restoration to conservation in this whole exercise? Once again as soon as the coin starts going backwards in the condition you have brought it too. Period. Anyway the coin is on its way back to Rob tommorrow. Thanks again Everyone for the comments and Support.


")