Split Second Chronograph Pocket Watch Restoration

Nitric

Silver Member
Mar 8, 2014
4,796
6,249
Dallas,GA
Detector(s) used
CZ6A
Primary Interest:
All Treasure Hunting
This isn't a detecting find, but it is an Ebay treasure hunt find. I bought it to see if I have the skills and to learn the skills I don't have. It's going to take me a while since I'm working on it in my spare time. This is what I've done so far.

Disassembled and played around for a couple of hours trying different methods on different parts to get the factory finish back. It will never be perfect. Just saw the restoration forum, I was bored, and thought I'd start a thread. :laughing7:

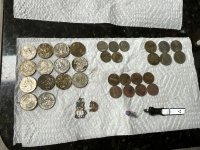
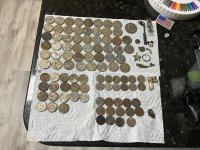
This is what I started with....

Chronograph pic.jpg
chronograph pic 2.jpg

These two pics aren't mine, I used them with permission from the person I bought it from, since I forgot to take pics before I started. These were his listing pics.
 

Last edited:
OP
OP
Nitric

Nitric

Silver Member
Mar 8, 2014
4,796
6,249
Dallas,GA
Detector(s) used
CZ6A
Primary Interest:
All Treasure Hunting
This is what I have after playing around for a few hours.... some fine stoning and cleaning...Still a long way from done....Just kind of jumping from part to part experimenting.:laughing7:
chronograph 3 001.JPG
chronograph 3 002.JPG
chronograph 3 003.JPG
chronograph 3 004.JPG
chronograph 3 005.JPG
chronograph 3 006.JPG
 

Last edited:

DeepseekerADS

Gold Member
Mar 3, 2013
14,880
21,725
SW, VA - Bull Mountain
Detector(s) used
CTX, Excal II, EQ800, Fisher 1260X, Tesoro Royal Sabre, Tejon, Garrett ADSIII, Carrot, Stealth 920iX, Keene A52
Primary Interest:
Other
Great! Good start Nitric! My eyes and shaky hands wouldn't even start this project! You have guts my friend!

1) starting the project to begin with.
2) putting it up on public forum.

We'll all be watching (was that a play on words?)!

Take your time, BUT!!! I can't wait to see the finished project. I used to collect pocket watches then the divorce happened. I still have a few.

Best of luck!
 

OP
OP
Nitric

Nitric

Silver Member
Mar 8, 2014
4,796
6,249
Dallas,GA
Detector(s) used
CZ6A
Primary Interest:
All Treasure Hunting
Great! Good start Nitric! My eyes and shaky hands wouldn't even start this project! You have guts my friend!

1) starting the project to begin with.
2) putting it up on public forum.

We'll all be watching (was that a play on words?)!

Take your time, BUT!!! I can't wait to see the finished project. I used to collect pocket watches then the divorce happened. I still have a few.

Best of luck!

Well??? This could still end up in a parts pile! You just never know with me! Heck I don't even know what I'll do yet!:laughing7:

I'm working with limited tools and budget. I don't have a lot of the good expensive tools that make life easier, as far as a true restoration. so I'm just working with what I have and kind of using this thread to send anyone to later on that might have tips or ideas. Tnet is about the only site I post anything on anymore.

There is only so much i'm going to be able to do with the plates. I don't have a way of replating, I have a lot to learn there too.

Just something kind of fun and we'll see where the whole thing ends up! :laughing7:
 

Last edited:
OP
OP
Nitric

Nitric

Silver Member
Mar 8, 2014
4,796
6,249
Dallas,GA
Detector(s) used
CZ6A
Primary Interest:
All Treasure Hunting
I have one cracked Jewel. I felt and heard it crack when taking it apart. One of the pivots was rusted so bad there really wasn't much of an option, it had corroded itself in tight. That and I didn't really pay any attention until it was too late. On the plus side, after I grind and polish the rust off the pivot, the dia. might be a little smaller. SO, replacing the jewel will correct any slop. If I have one....That's going to be a whole other battle! Locating my parts that are packed away in boxes! And finding the jeweling tools! Here's a couple of pics, and one of the cracked jewel through a microscope. (using an older Microstar IV)

added...I was wrong...after looking again....The pivot that was corroded in was beside this one. so maybe I put a bind on it when trying to get it apart. Not that it matters...Just wanted to correct the wrong info above. :laughing7:


jewel 002.JPG
jewel 001.JPG
 

Last edited:
OP
OP
Nitric

Nitric

Silver Member
Mar 8, 2014
4,796
6,249
Dallas,GA
Detector(s) used
CZ6A
Primary Interest:
All Treasure Hunting
new jewel....and some other pics....

I'm not happy with the crimp on this jewel, I'm going to try to clean that up. These are crimped in, and if you play with it too much you end up with a mess. I learned how to do it on my own so I may do it wrong. Some that I do come out perfect and others turn out jagged like this one did. I'll just say I hate the crimp in jewels!:laughing7: It will hold fine! I'm just really picky and stuff like this bothers me!(the jagged edges on the crimp):laughing7: The pics are going in reverse...

jewel work 012.JPG
New jewel under microscope...
jewel work 007.JPG
Pressing the old cracked jewel out..
jewel work 008.JPG
Tools used to open the crimp and to recrimp the new jewel in...I have a big jeweling set, but I like using the simple older tools for this..for me I have more control and I learned on my own from trial and error, so I don't even know how to use all the stuff in the big set properly...It's just for looks I guess! :laughing7: I have better luck with it on wrist watches and the friction jewels.
 

Last edited:
OP
OP
Nitric

Nitric

Silver Member
Mar 8, 2014
4,796
6,249
Dallas,GA
Detector(s) used
CZ6A
Primary Interest:
All Treasure Hunting
In case anyone is following my nonsense!:laughing7: Or if you found this thread trying to learn on your own too. I jumped to grinding and polishing the rust off of the screws. In the past I've always just tossed any nasty screws in the trash and went to the screw drawer with thousands to choose from.

For this project I wanted to save everything that I could possibly save. I don't have a screw polisher, so I'm using a couple of old stones,an old jewelers lathe,brass block and whatever else I can find laying around the house that will give me good results. I'm working the lathe by hand, rocking it back and forth like you would a hand screw polisher, while using a giant knife sharpening stone to start, then working my way down.

While looking through drawers I found some diamond powder! I thought cool! That should work?

NOOOOO! Huge mistake! I don't ever remember reading this in any book or on the net anywhere when you see people using diamond powder.......I have it everywhere and it does not go away! :laughing7: It has contaminated everything! What a mess!! My stones have scratchy stuff now when I'm trying to get a fine polish! That powder is on the bench, on tools, in the stones etc..And I just used a tiny amount! Lesson learned! What I have is obviously to course and does not belong anywhere near anything that would need polished on a watch!

I'll post some pics later of the polished screws and what I did to get the polish with what was laying around. No expensive tools or products.
 

Last edited:

Oregon Viking

Gold Member
Jan 6, 2014
12,255
37,947
Brookings-Harbor Oregon
Detector(s) used
White's prizm IV
Keene A52 with Gold Hog mats
Gold-N-Sand hand dredge
Primary Interest:
All Treasure Hunting
OP
OP
Nitric

Nitric

Silver Member
Mar 8, 2014
4,796
6,249
Dallas,GA
Detector(s) used
CZ6A
Primary Interest:
All Treasure Hunting
And when you put it all back together.....and have a few parts left over...:BangHead::laughing7:
That's what would happen to me...

Where do you think my drawer of screws came from? :laughing7: Sometimes you have "didn't need it parts!" :laughing7:

The bad part? Almost all those screws are different. Most only go in one spot! That gets a little tricky sometimes when you don't separate them......UMMMMM? like in my pic? :laughing7:
 

OP
OP
Nitric

Nitric

Silver Member
Mar 8, 2014
4,796
6,249
Dallas,GA
Detector(s) used
CZ6A
Primary Interest:
All Treasure Hunting
I spent some hours today polishing screws and working on cleaning up the balance wheel. I kind of jump around.:laughing7: There is a half reason for jumping around, I want to get all the parts for the time part of the watch working. Then once it's working and ticking move to the chronograph parts.

I haven't even started polishing all screws, just the ones with rust. I'm not thrilled with my final finish on some. Until I figure out which ones are visible when the watch is together, I'm kind of roughing them in for now. That and this takes Hours and hours to put a mirror shine on all screws. It does for me at least.

Here's more pics..
3 polishing 006.JPG
The big stone is for really crusty pitted screws, then the smaller stone, then a little Simichrome on a brass block. I started using the lathe at different speeds, usually slow at first, then with the simichrome and brass running it at a higher speed down to barely touching the screw head, almost no pressure at all. I also found that if I took a a piece of paper and held the screw in tweezers with barely any simichrome for a final polish works good too. Each screw from start to finish is anywhere from 10 to 30 min for me. This is why I started short cutting until I know which screws will be seen or not.

The reason I used simichrome is because it was in the bench, I'm sure any fine polish or many other methods work. I'm still learning and this is the way it's working for me so far and until I find a better or faster way! All I know is every once in a while I still hear and feel a piece of the diamond powder hit and put a heavy scratch in something I'm trying to polish! I wish I would have never opened that stuff up!!!

3 polishing 004.JPG
Most looked great in the sun light! Now that I'm working under the bench light only, I see more fine scratches. I'll touch the visible screws up later. I still have a lot more to do yet..
3 polishing 002.JPG
Rusty balance...
3 polishing 003.JPG
Balance with screws removed...
3 polishing 007.JPG
Balance part way done..I'm still kind of picking at it. I had to leave a few pits, if I sand until those are gone? I think I'll be removing too much material. They are deep pits. I had to remove a lot as it was, the rust was pretty bad. Basically what I'm picking at now is the arm or spoke? I want that a little nicer and matching the look of the other side. I'm hoping the screws/weights will polish up when it goes in the cleaner. Then I'll check it for round and poise. It probably should have been replaced, but my goal is to try to save anything I can and I'm sure I'll be picking at this watch forever! So, for now, I'm going to have to leave some things if I ever want to make it through the project and keep this thread going! If not It will take forever! I'll Just keep finding flaws! :laughing7:

I also just read on the net that Tea will eat out the iron oxide. I guess tea is a little better than using vinegar. Sorry, I was jumping around and don't know what article or who to give the credit to... A net search will bring it up and go into more detail.
 

Last edited:
OP
OP
Nitric

Nitric

Silver Member
Mar 8, 2014
4,796
6,249
Dallas,GA
Detector(s) used
CZ6A
Primary Interest:
All Treasure Hunting
I wanted to add something else I noticed...This might all just be in my mind...But it seems if I leave the iron oxide and oil mix build up on the smaller stone I'm getting a nicer finish. Not so it's caked in the stone but a oily rusty mix, not quite paste, I was wiping it off, then I started leaving it and was ending up with better results? I have no idea if the oxide itself is helping with the polishing or if it's maybe blocking some of the grit of the stone? Whatever is happening there? It's working! I do know it is some of the hardest stuff there is! Or...seems like it when trying to remove it carefully!:laughing7:

OHHHH! And something else I noticed that I've never noticed before! Every Time I'm using the lathe with my hand on it, then bump my head into the movable metal bench light? I get shocked in the forehead! You would think that after a couple of times I would fix that! But nooooo! Do it and yell all the time! So, Grounds are next! This is an old lathe with an AC/DC brush motor it was rewired by the previous owner with a two prong lamp cord. I only use this lathe for polishing or cutting/modifying cases etc... Any real fine machine work is done on a different lathe. :laughing7: Ground is important I guess! :laughing7:

I see it now.......Touch the light with fore head, drop the hand held motor control(with the back broken open exposing wires and rheostat that is smoking hot!!That someone else threw away and I patched back together! Well?..... just enough to work!:laughing7:) into my lap,Grab for it because it's burning my leg and stick fingers inside through the broken back!! etc.... I'm not even going to take a picture of what I'm working with here! It's like a mad scientist's junk lab! :laughing7:
 

Last edited:
OP
OP
Nitric

Nitric

Silver Member
Mar 8, 2014
4,796
6,249
Dallas,GA
Detector(s) used
CZ6A
Primary Interest:
All Treasure Hunting
Ok Here is a pic......I'm not joking!:laughing7: Well, I am..But.........

motor control 001.JPG
 

Last edited:
OP
OP
Nitric

Nitric

Silver Member
Mar 8, 2014
4,796
6,249
Dallas,GA
Detector(s) used
CZ6A
Primary Interest:
All Treasure Hunting
Today, I just polished a few more screws, and I'm now working on wiring and grounds. And possibly fixing the motor control in the post above. Haven't really gotten much done, or anything really picture worthy.:laughing7:
 

OP
OP
Nitric

Nitric

Silver Member
Mar 8, 2014
4,796
6,249
Dallas,GA
Detector(s) used
CZ6A
Primary Interest:
All Treasure Hunting
Still polishing screws here and there, Haven't worked on much this past week.

I didn't give up! Just have been sidetracked for a few days!:laughing7:
 

Limitool

Gold Member
Jun 9, 2013
5,266
6,817
Middle TN. area
Detector(s) used
White XLT Spectrum E-Series
Primary Interest:
Metal Detecting
Damn guy.... That's way out of my league. I have my fine points but what your doing is NOT one of them. Let me know how THAT project works out!!!!!!!!!!!! :thumbsup:
 

OP
OP
Nitric

Nitric

Silver Member
Mar 8, 2014
4,796
6,249
Dallas,GA
Detector(s) used
CZ6A
Primary Interest:
All Treasure Hunting
Well Limitool? I have to set it aside for a while! I'm not going to have the time I thought I was going to have when I started the thread!(which is a good thing!:laughing7:) So, this will be a LOOOOOOng drawn out thread!

I'm finding the time involved is just crazy! At least for me it is...I'm still rough around the edges, but I now have a running watch! So far only replacing a jewel and a hairspring pin. The hair spring needs replaced at some point, but I was able to clean it up enough to make it tick! I don't hear it rubbing and it sounds strong, but it should be replaced. Next I'll pick at the chronograph parts of it!! Here is what I have so far..And it has taken hours and hours to get it to this point and just this much of it still needs some more work. I had to let some stuff go as "good enough" for now! :laughing7:
Added.... The camera does pick up fine scratches and makes them really stand out you don't see most of that in person! I looked at the blown up picture and see all kinds of stuff I can't see when it's in front of me!:icon_scratch: Lots of "missed a spots"!:laughing7:
chrono5 003.JPG
chrono5 004.JPG
 

Last edited:

Oregon Viking

Gold Member
Jan 6, 2014
12,255
37,947
Brookings-Harbor Oregon
Detector(s) used
White's prizm IV
Keene A52 with Gold Hog mats
Gold-N-Sand hand dredge
Primary Interest:
All Treasure Hunting
How many parts will you have "left over" or "extra" ??:laughing7:
None I'll bet!
 

OP
OP
Nitric

Nitric

Silver Member
Mar 8, 2014
4,796
6,249
Dallas,GA
Detector(s) used
CZ6A
Primary Interest:
All Treasure Hunting
Kind of like a couple 2-3 head bolts in the Maxwell can after a quick weekend rebuild job.... What the hell!!!!!!!!

That's funny! I'm sure I've done that! :laughing7:I changed a rearend in a car years ago, almost along the road where it broke! Was lucky enough to have a friend live right there and we did it at the end of his drive in one night...Just putting enough bolts in the replacement to get it home...I drove that car for a year after that beating the crap out of it! When I went to sell it the guy was looking it over and says.."there's no nuts on the leaf spring or shackle bolts!" Then the bracket that bolted to the frame for the front shackle only had two of the four nuts on each side!! How it stayed together and nothing fell apart is still a mystery to me, through neutral slams and donuts!!:laughing7:
 

fowledup

Silver Member
Jul 21, 2013
2,757
5,162
Northern California
Detector(s) used
Whites GMT V/SAT
Primary Interest:
Prospecting
That is awesome Nitric, and I thought some of the trigger mechanisms I play with were tiny and complicated! I'm truly enthralled and hynotized by shiny objectss, no seriously I could stare at the working of a pocket watch for hours. If you get a chance would you take a photo of the basic tools needed for working with watches and give a little description of what each does? I'm finding that a lot of the material out there assumes the viewer/reader already knows what their looking at.......Maybe you should do a youtube channel on basic how to's and techniques?
 

Top Member Reactions

Users who are viewing this thread

Top