RotZorn
Sr. Member
- Feb 12, 2013
- 371
- 124
- Detector(s) used
- F5,F2,MPX,1T-Pilot
- Primary Interest:
- Metal Detecting
Let's be real, the Fisher F-point / Bounty Hunter pinpointer isn't that great. But for the price it's better than no PP at all, in my opinion. So I started thinking of ways it could be improved upon- First thought.... The First Texas group could design something a little more on par with the pin pointers from the guys at Garrett or Minelab.... But until that happens I decided to try to improve on the platform at hand.
I decided to add two things when I started-
1) A VISUAL INDICATOR
2) A REAL VIBRATION DIVICE- not just the lousy buzzer you can barely feel.
I checked out YouTube to see what other people were doing to mod it, and was happy to see an LED on the board! There's my visual indicator!
Next I started thinking about what to use for a good solid vibration when I hit a target. Went through some old tech I had lying around- cell phones, my kids toys, even went as far as raiding the wife's nightstand! Then I remembered on top of my work bench I had a 360 controller that died a while back...... Ding!!!! The rumble on the 360 pads is excellent!!!! So that's what I used! It actually has 2 rumble motors- I went with the one with the smaller weight on the shaft, the larger one was too much vibe.
I tried to keep everything neat inside but instead of soldering every connection as I had originally intended, I ended up having to use some electrical tape. Also, the partition between the battery and the electronics, board etc. had to be removed. I used foam, in small pieces, to keep everything in place, so the battery is still easy to swap.
Pics-

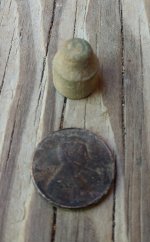
The small clear peg is one of those "light conducting" clear plastic ones found in common electronics. Got this one from an old Samsung phone charger. It keeps the actual LED from being exposed, and allows for the future removal of the guts, should I ever have to take it apart again.

Light on, on target!

A semi- exploded view of everything as it fits inside the casing.

The green LED glued to the upper back of the pot/ on-off switch. The clear peg is simply inserted into a hole drilled into the case (directly above the LED) and also glued in place. I used Scotch brand Gel glue to prevent any running and messes. I was going to use Gorilla glue, but I decided not to because one surface has to be wet (hello...electronics?) and I just didn't have room for any expansion as Gorilla glue usually does quite a bit of.

The 360 controller rumble motor- fits like a dream! Already has a foam wrap around it in the controller, so it stops any of that metal against plastic buzzing when you hit your target. "Good, good, good- good vibrations!" Lol sorry couldn't resist!

Chose to solder the 4 connections in the pic above because the designers- for whatever reason- chose to make the loop in the circuitry imperative- IT HAS TO BE CLOSED FOR YOUR PIN POINTER TO WORK- the crazy part of this is that you would NEVER see the LED that was installed at the factory because its closed in case Why it has an LED at all if you would never see it is beyond me

The finished product lighting up and vibrating on a clad Q!
I would like to add that if you try to replicate my Frankenstein work here, that you will void any warranty and if you fail boat it, and your pin pointer no longer works..... I'm not responsible! The fine print stuff.... Had to throw it in!
I decided to add two things when I started-
1) A VISUAL INDICATOR
2) A REAL VIBRATION DIVICE- not just the lousy buzzer you can barely feel.
I checked out YouTube to see what other people were doing to mod it, and was happy to see an LED on the board! There's my visual indicator!
Next I started thinking about what to use for a good solid vibration when I hit a target. Went through some old tech I had lying around- cell phones, my kids toys, even went as far as raiding the wife's nightstand! Then I remembered on top of my work bench I had a 360 controller that died a while back...... Ding!!!! The rumble on the 360 pads is excellent!!!! So that's what I used! It actually has 2 rumble motors- I went with the one with the smaller weight on the shaft, the larger one was too much vibe.
I tried to keep everything neat inside but instead of soldering every connection as I had originally intended, I ended up having to use some electrical tape. Also, the partition between the battery and the electronics, board etc. had to be removed. I used foam, in small pieces, to keep everything in place, so the battery is still easy to swap.
Pics-
The small clear peg is one of those "light conducting" clear plastic ones found in common electronics. Got this one from an old Samsung phone charger. It keeps the actual LED from being exposed, and allows for the future removal of the guts, should I ever have to take it apart again.
Light on, on target!
A semi- exploded view of everything as it fits inside the casing.
The green LED glued to the upper back of the pot/ on-off switch. The clear peg is simply inserted into a hole drilled into the case (directly above the LED) and also glued in place. I used Scotch brand Gel glue to prevent any running and messes. I was going to use Gorilla glue, but I decided not to because one surface has to be wet (hello...electronics?) and I just didn't have room for any expansion as Gorilla glue usually does quite a bit of.
The 360 controller rumble motor- fits like a dream! Already has a foam wrap around it in the controller, so it stops any of that metal against plastic buzzing when you hit your target. "Good, good, good- good vibrations!" Lol sorry couldn't resist!
Chose to solder the 4 connections in the pic above because the designers- for whatever reason- chose to make the loop in the circuitry imperative- IT HAS TO BE CLOSED FOR YOUR PIN POINTER TO WORK- the crazy part of this is that you would NEVER see the LED that was installed at the factory because its closed in case
Why it has an LED at all if you would never see it is beyond me
The finished product lighting up and vibrating on a clad Q!
I would like to add that if you try to replicate my Frankenstein work here, that you will void any warranty and if you fail boat it, and your pin pointer no longer works..... I'm not responsible! The fine print stuff.... Had to throw it in!


Last edited: