John-Edmonton
Silver Member
- Mar 21, 2005
- 4,400
- 3,953
- Detector(s) used
- Garrett- Master Hunter CX,Infinium, 1350, 2500, ACE 150-water converted 250, GTA 500,1500 Scorpion, AT Pro
You will learn more about your metal detector in one hour in your test garden, then 10 hours in the field. Why? Because you will learn how a particular object will sound on your metal detector in real conditions in your dirt at home. And.......once you learn your your metal detector with your known targets in your own dirt, you can easily see how another detector will work in your own dirt. Having someone tell you that brand X detector gets 10 inches on a quarter means nothing to you, as it just depends on the type of dirt the target is being detected in. The common misconception that that someone will tell you about their metal detector is that it gets 10 inches on a dime. Well, that all depends on type of soil, mineralization of soil, humidity in soil, orientation of target to soil, size of dime, silver or clad dime, oxidation on dime coil size, detector settings and so on. etc. What might be important to you is how deep that dime will read in YOUR soil. And depth alone shouldn't be the #1 reason for buying a detector either. Target separation is important also, especially in junky areas. A larger coil with added depth will actually work against you in a lot of these circumstances. Having the ability to ground balance a metal detector is also important, especially if it can be ground balanced to salt water. OK....enough of the confusing stuff.
Setting up a test garden is quite simple.....find a piece of dirt in your own back yard, or a small area in a park or off the beaten path where someone is not likely to metal detect. If you don't own a house, a relative or friend will probably let you use their property. You are not ruining anything for that matter. Grab some clad coins, some silver coins, copper coins, common and beaver tail pull tabs and some nails. These will be your known targets which will be planted with known depths. But before you bury anything, grab your AT pro in pro mode, zero discrimination and remove all junk from the areas to be used as a test bed. All cleaned up? Great!
Next, bury various targets at various depths, with the least amount of damage to the grass. Get a ruler and measure the actual (preferred) depth of your targets. make sure the target is laying horizontal. Fill in the hole. PLEASE make a detailed drawing of your test garden and make spare copies. Our memory will fail us over time. That test garden is built to teach you how the metal detector works at a KNOWN target, not a guessed one.
You can refer to this garden every time you buy a new coil, think there is something wrong with your metal detector, experimenting with super tuning your metal detector for low or high conductivity targets (gold or silver) or just comparing different brands.
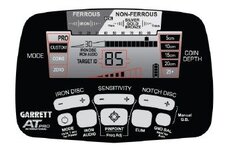
Below is my own test garden at home, with all information written in the 1" x 2" board, for simplicity. When using the test garden, I just line up the ends of the 1" x 2" with a mark on the fire pit brick and a shallow penny at the far end. But, you can do things differently, get creative and go in a different direction. Once complete, spend some time with your AT Pro in that new test garden.. Listen to the audio in Pro and Standard Mode. Look at the digital numbers for each target. Try different swing speeds, at different heights. Start remembering the common patterns. See if the guy across town who brags that his detector can get 20" in the dirt on a dime is really being honest.
You will really feel confident with your AT Pro the next time you get out in the field. Good luck and I hope some great targets come your way.

Setting up a test garden is quite simple.....find a piece of dirt in your own back yard, or a small area in a park or off the beaten path where someone is not likely to metal detect. If you don't own a house, a relative or friend will probably let you use their property. You are not ruining anything for that matter. Grab some clad coins, some silver coins, copper coins, common and beaver tail pull tabs and some nails. These will be your known targets which will be planted with known depths. But before you bury anything, grab your AT pro in pro mode, zero discrimination and remove all junk from the areas to be used as a test bed. All cleaned up? Great!
Next, bury various targets at various depths, with the least amount of damage to the grass. Get a ruler and measure the actual (preferred) depth of your targets. make sure the target is laying horizontal. Fill in the hole. PLEASE make a detailed drawing of your test garden and make spare copies. Our memory will fail us over time. That test garden is built to teach you how the metal detector works at a KNOWN target, not a guessed one.
You can refer to this garden every time you buy a new coil, think there is something wrong with your metal detector, experimenting with super tuning your metal detector for low or high conductivity targets (gold or silver) or just comparing different brands.
Below is my own test garden at home, with all information written in the 1" x 2" board, for simplicity. When using the test garden, I just line up the ends of the 1" x 2" with a mark on the fire pit brick and a shallow penny at the far end. But, you can do things differently, get creative and go in a different direction. Once complete, spend some time with your AT Pro in that new test garden.. Listen to the audio in Pro and Standard Mode. Look at the digital numbers for each target. Try different swing speeds, at different heights. Start remembering the common patterns. See if the guy across town who brags that his detector can get 20" in the dirt on a dime is really being honest.
You will really feel confident with your AT Pro the next time you get out in the field. Good luck and I hope some great targets come your way.