Bill D. (VA)
Silver Member
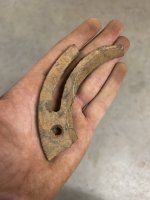
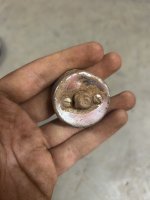
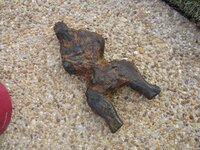
I received confirmation this morning from an authority working at the Colonial Williamsburg Foundation that this artifact is indeed an upright from a colonial andiron, and not a boot jack. But the date of manufacture couldn't be narrowed down any closer than between the late 1600s and 1800. But that still makes it colonial. I hope to repost pics of the andiron once cleaning has been completed in a few weeks.
Amazon Forum Fav 👍


Attachments

Upvote
16
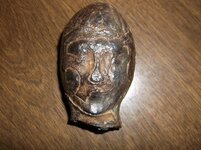

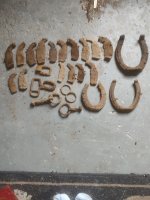
 . Looks like it's got a tale to tell.