FIRST, go to page 12 in the manual and MAKE SURE you have set your tone frequency to match YOUR hearing the best. Do you hear high or low tones better? Next, set your pulse width to about 3/4 power (2-230pm position). Turn your threshold up to where you can barely hear it above the waves and wind noise - like a mosquito hum, and use the machine in NORMAL mode.
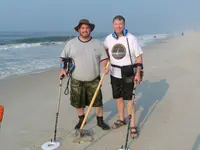
DO NOT just walk up or down the beach in one direction or the other! Pick yourself a 50-yard long beachfront, and start gridding it. You start at the wet sand high mark and detect right into the water thigh-deep, move over a step and detect right back up to the high wet sand mark.. Rinse and repeat until the whole 50-yards or 5-hours is done.
Slight “Positive” signals are also called “whisper” signals. This is a very soft or slight, almost unnoticeable, rise in the threshold signal. It will always be repeatable over the target – not random. If your threshold is set too high, or too low, you can miss them easily. If your threshold is not smooth you can miss these whisper signals easily. T
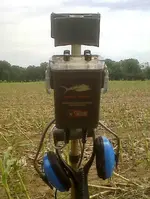
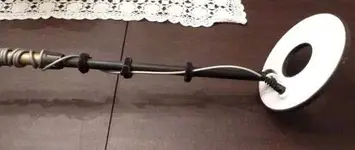
here can be a couple of reasons, including EMI, for an unstable threshold. The most common is too much pulse width. Sometimes you can max it out, sometimes you can only run it at the 12-1 o’clock position. It depends on the beach. If you want to make your machine more sensitive and cut down on interference, make sure you are not wrapping your coil wire close to the coil down on the lower plastic rod (see photo).
“Negative breaks,” are also referred to as whisper signals. This is when the threshold gets quieter, or goes away completely over the target. Again, negative breaks are always repeatable over a real target – not random. As you remove a little sand from over the target and re-sweep with your coil, the signal becomes a slight or stronger positive signal.
I use “Normal” mode, because it is easier for me to hear these positive and negative breaks in the threshold – that does not hold true for everyone. It takes time on the headphones to learn to recognize whisper signals, usually over 100-hours. Sometimes actually speeding up your swing back and forth helps to recognize these signals when you encounter them. The general rule however is always to SLOW down and pay attention.
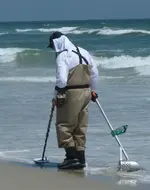
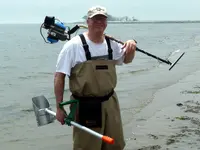
I’m right-handed, so I swing the Sand Shark with my left arm. I mount the box up high and use the arm strap so that I let go of the detector and use my left hand to remove the target from the scoop. The arm strap keeps the detector right there attached to me, but gives me the ability to use both hands. Lastly, using your scoop effectively takes practice in the water. I put my toe just in back of the pinpointed target then place my scoop right in front of my toe for the recovery. This works well with practice. You’ll learn to time the waves.
Sand Scoop - Whether hunting fresh- or salt- water beaches, you need the right equipment to recover your targets. A good beach or sand scoop is a must. Choose your scoop based on the types of beaches you will be hunting, and the area of the beach. Generally, a long-handled large capacity sand scoop is desirable in the water. Aircraft-grade aluminum and stainless steel scoops come in a variety of shapes, lengths, weights, and prices. In the dry sand, a short-handled scoop is usually faster and easier to use. Do not buy a cheap scoop. This piece of equipment is essential - and just as important to your success as the metal detector you choose. I use the Reilly's Treasured Gold Aluminum Monster.
Finds Pouch - You will need a pouch to put your finds in. An inexpensive cloth nail pouch works great on the beach, but you will need something a bit more substantial for your wet sand and water finds. Large, open mesh, multi-pocket belt pouches with Velcro closures are ideal for the water. They allow the sand and water to rinse out, and secure your finds so they are not lost in the surf - again! I use the KellyCo Mesh Pouch.
Waders - Waders are the least expensive way to get into the surf at low tide. In most ocean beach situations, waders will only be serviceable to depths just above the knee due to wave action. Important things to look for in quality waders include weight; fabric thickness; flip out storage pockets; high-density neoprene booties (rather than heavy rubber boots); and a good wading belt should be included. Lightweight slip-on beach shoes can be worn over the neoprene booties.
Wetsuits - Fit is the most important factor when purchasing a wetsuit. You must try on the wetsuit, as every wetsuit manufacturer's size chart is different. Thickness is also important. The thicker the suit, the warmer. 'Smoothie' neoprene stretches better and is warmer in windy conditions. Seams are also important. The types of seams used in a wetsuit differ greatly.
An "Overlock" seam is found on inexpensive suits. This type of stitch lasts forever but it is not watertight, and can cause skin irritation or a rash as it protrudes against the skin. A "Flatlock" seam is a flat stitch that does not push into your skin like the overlock. It is not watertight, but does not cause as much of a rash or chaffing problem. The "Blindstitch," is a flat stitch that does not penetrate all the way through the neoprene, so there are no stitch holes. It is watertight which makes a tremendous difference. Blindstich seams are found only on more expensive wetsuits.
Last but not least, wetsuit zippers - or closures, are extremely important. "Back-zip" suits are the most common type. Look for a sturdy metal zipper (rather than plastic), and thick flaps behind the zipper to prevent water flushes. You would look for the same qualities in a "Shoulder-zip" suit.
Footwear - There are dozens of choices when it comes to beach and water shoes, and many bargains to be found. Look for a shoe that meets your exact needs. It should be metal-free, and as light as possible without sacrificing your overall comfort. Beach hunters can spend four- to six- hours gridding the sand at their local beach. Comfort and breathability are extremely important. Sandals suck in the surf.
Hat - Anyone who spends a lot of time on the beach knows the importance of a quality, long billed cap. There are several things to look for in a good beach detecting cap. Be sure the cap feels comfortable with your headphones and sunglasses on. A cap should be breathable, and offer a sun flap to protect the back of your neck.
Sunglasses - Eye protection should be a top priority while spending long hours in the sun. Extended exposure to reflected light and glare from sand and water can cause real discomfort, and even damage to your eyes.
Beach Detecting Strategies; When and Where to find treasure on the beach
The beach is divided into two-sections - The "Dry Sand" or blanket area, and the "Wet Sand" or swimming area. When detecting the dry sand areas, successful beach hunters "grid" individual sections of the beach. Start by choosing an area 50-feet long, by 50-feet wide. First detect from the North to South. When you have detected the entire grid, turn 90-degrees and detect it again East to West.
Moving slowly and methodically, you will be able to pass your coil over every inch of the 50' x 50' area. Coins, watches, rings, bracelets, Ipods, cell phones, car keys - you'll find it all! The phrase to remember is "low and slow." Keeping your coil as low and flat to the sand as you can, while moving slowly enough to assure your sweeps overlap each other is the real key to success.
For tips on hunting the surf and wet sand remember rings and jewelry are lost in the water during both High, and Low tides. You can get to these treasures much more quickly during Low tide however. At Low tide, get into knee- to thigh- deep water to get to the jewelry that was lost at High tide by people swimming, frolicking, throwing Frisbees, footballs and such. Look for streaks of Black sand on the beach at the waterline. These are always an indicator of where other heavy things like coins and jewelry will be deposited. Many beaches will only have Black sand streaks after a storm, or unusually heavy wave action. Storms uncover things that have been out of reach for many years as the sand gets ripped away. You have to act fast however during low tides, as a couple tide changes can start covering it all up again. Look for hard clay patches that are showing and detect the small depressions that look like miniature potholes.
Hope this helps you, and feel free to PM me with any other questions or explanations.