Astrobouncer
Hero Member
- #1
Thread Owner
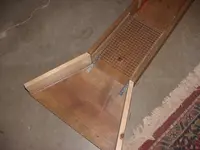
So this is my 5th sluice I have built so far. Each time I build one, I learn things and make note of things I want on the next one.
The key features on this one, starting from front to back:
About 4 feet long.
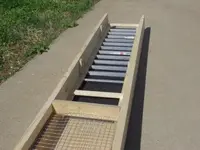
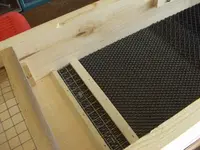
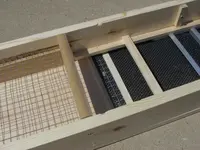
1/2 inch Classifier built in to the front of the sluice so you don't have to pour water on the material to classify it. This way the shoveled material will sit in the water and the current will wash the material back. It sits high up so there's still plenty of room for the current to pass through the sluice and move material.
Rubber mat nugget trap after the skid plate to help with sampling. (This will be deep v groove mat when it gets here, right now its tool box liner).
Inspection mat is also tool liner for now, this will also be deep v groove once that arrives.
Raised wooden bar above the inspection mat for a sluice magnet. (haven't got the magnet yet though)
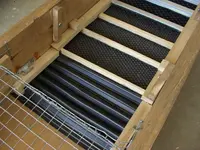
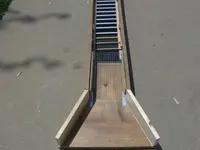
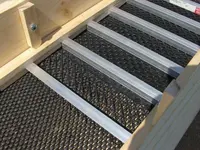
Riffles are closer together at 2 inches and aluminum Hungarian riffles to help keep the material moving and not build up like my last sluice does. The first riffle is facing the opposite way to help speed up velocity. My last riffles were 3 inch in my other sluice and those clog up to easy IMO.
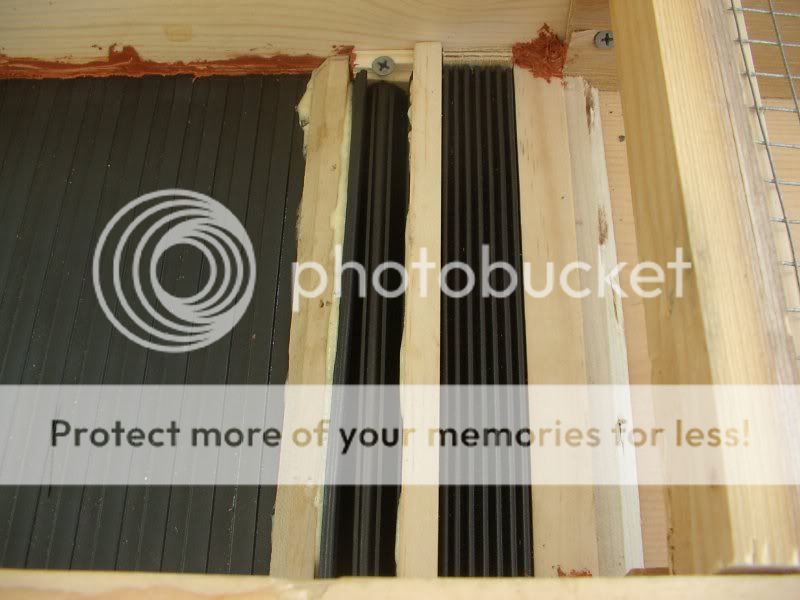
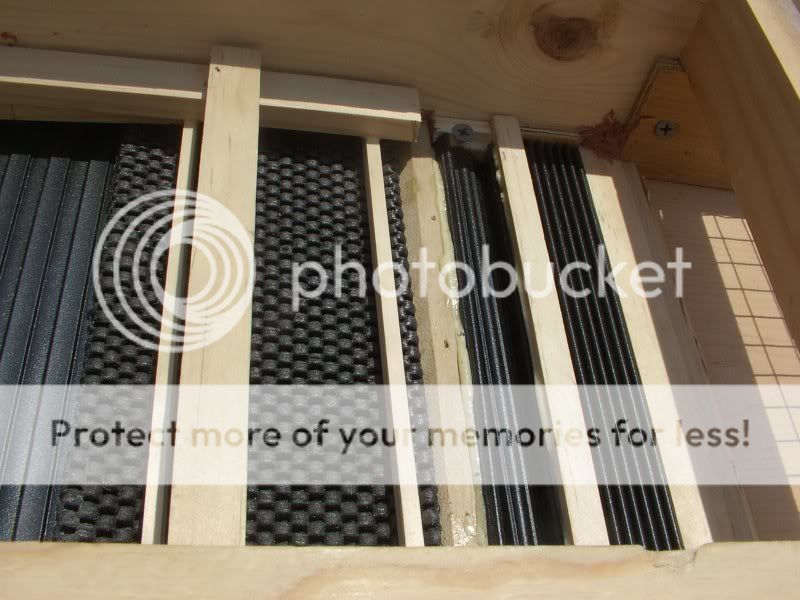
Black cloth with grooves in it for the bottom, and then black expanded mesh over that to catch the fines.
Easy removal of the riffles by turning the 4 wooden pegs and it slides right out. The wooden pegs also provide extra clamping power to keep the riffles firmly pushed against the carpeted bottom.
Raised lip on the end to hopefully help retain the fines.
And the best part of all: Spent 7$ on the aluminum, 11$ on the wood, 1.50$ on the carpeting. So 19.50 total investment . Took 2 days to cut it all, fabricate, measure it, and put it together.
Tomorrow I will hit up North Carolina and put it to the test. And get some pictures of it on the river.
The key features on this one, starting from front to back:
About 4 feet long.
1/2 inch Classifier built in to the front of the sluice so you don't have to pour water on the material to classify it. This way the shoveled material will sit in the water and the current will wash the material back. It sits high up so there's still plenty of room for the current to pass through the sluice and move material.
Rubber mat nugget trap after the skid plate to help with sampling. (This will be deep v groove mat when it gets here, right now its tool box liner).
Inspection mat is also tool liner for now, this will also be deep v groove once that arrives.
Raised wooden bar above the inspection mat for a sluice magnet. (haven't got the magnet yet though)
Riffles are closer together at 2 inches and aluminum Hungarian riffles to help keep the material moving and not build up like my last sluice does. The first riffle is facing the opposite way to help speed up velocity. My last riffles were 3 inch in my other sluice and those clog up to easy IMO.
Black cloth with grooves in it for the bottom, and then black expanded mesh over that to catch the fines.
Easy removal of the riffles by turning the 4 wooden pegs and it slides right out. The wooden pegs also provide extra clamping power to keep the riffles firmly pushed against the carpeted bottom.
Raised lip on the end to hopefully help retain the fines.
And the best part of all: Spent 7$ on the aluminum, 11$ on the wood, 1.50$ on the carpeting. So 19.50 total investment . Took 2 days to cut it all, fabricate, measure it, and put it together.
Tomorrow I will hit up North Carolina and put it to the test. And get some pictures of it on the river.


")