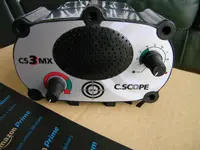
The 3MX is a good motion machine at a very fair price. The only drawback is a lack of coils apart from the stock one.
The similar styled CS4PI is a bargain in the P.I. world. Again no coil choice but deep, light in weight and cheap to run.
C.Scope cs3mx modification:
1) Remover the batteries, then the screws from front of the machine.
2) Carefully ease off the front panel (no need to remove contol knobs).
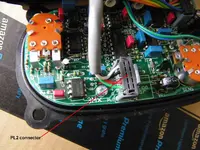
3) Disconnect the plug from the detector component board (marked PL2)
4) Push the cable, together with the tapered rubber grommet, back into the main box. Then ease the grommet a few inches back down the cable (toward the detector head). Snip the cable approx one inch, or you could leave it longer, away from the cable-tie (in the direction of the detector head).
5) Remove the outer cover on both ends of the wire which you have just cut (approx half an inch, not critical), remove the blue plastic/silver shielding which is wrapped around the pairs of wires, then bare the ends of the 4 wires ready for soldering to the plug and socket. The 5th, a ground wire, is already bared
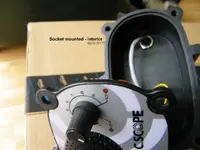
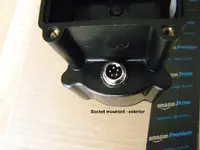
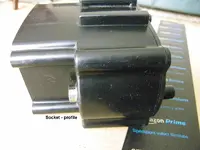
6) Carefully, and taking your time, enlarge the hole through which the rubber grommet passed, this needs to be just slightly larger that the socket which you are about to fit. Remove the nut from the socket (thats the female one) and discard the spring washer, if present. Place the nut over the cable and feed the cable through the hole in the case. Solder all 5 wires to the socket (the one`s from inside the control box), wrap a little electrical tape around the wires so as to prevent the possibility of them shorting out on anything that may accidently come in contact with them. Locate the socket in the detector case then srew on the nut tightly so as to hold it in place. If you forget to put the nut over the wires before soldering them to the socket you will have to unsolder them and do it all again! Note, you may wish to add a thin rubber washer to the socket before locating it in the hole in the casing so as to prevent the ingress of water etc. MAKE A DRAWING OF THE (FEMALE) SOCKET FOR FUTURE REF, so you know which coloured wire it attached to which pin. Plug the lead, PL2, back into the detector component board.
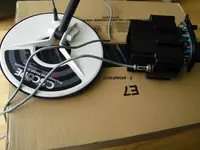
7) Solder the 5 wires from the detector head to the (male) plug, making sure that the colours match with the corresponding colour/pin on the (female) socket i.e black to black, red to red, wrap a little electrical tape around the bare wires to prevent shorting, then screw on the outer casing and tighten the cable relief screws.
8) Scew the control panel back onto the detector casing and jobs done.
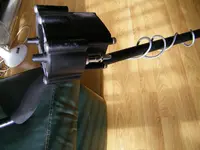
The machine has been tested and there is no difference whatsoever in its performance that I can detect (no pun intended) and by modifying it in this way it prevents the kinks and twists that build up in the cable when it was permanently attached to the control box. The other benefit is obvious, you can use other c.scope search heads simply by cutting off the plug connecting a 5-pin one.
Parts bought:
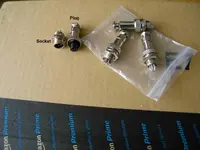
5pcs GX12 12mm Male and Female Metal Aviation Plug Socket Connector 5p 4p 3p 2p
£3.34 free p&p from China (seller: electronics_lee - You need to select the 5-pin option, very quick delivery)
Also purchased a bottle of (medium) threadlock to prevent the inner section of the male plug from unscrewing during use, usually, these connectors have a small screw to do this, but not present on these connectors.
If you decide to carry out this simple modification I accept no responsibility whatsoever if anything goes wrong, you do so out of your own choice.


 ? the CS5MX is a damn good detector.... i will guarantee it myself...... if he gets it and doesnt like it i will buy it from him... as long as it is the CS5MX.... i dont want any of the other ones..... you have this post for reference that i will buy it
 .
.


