Chadeaux
Gold Member
- Joined
- Sep 13, 2011
- Messages
- 5,512
- Reaction score
- 6,409
- Golden Thread
- 0
- Location
- Southeast Arkansas
- Detector(s) used
- Ace 250
- Primary Interest:
- Cache Hunting
- #1
Thread Owner
I've always had trouble with dodging (lightening areas of a photo) and burning (darkening areas of a photo). Too dark where it shouldn't be, blown out highlights, etc.
What I discovered that helped me (still a way to go, but getting better) was playing with the dodge and burn blend modes.
For instance, this is the unretouched version of the pic:
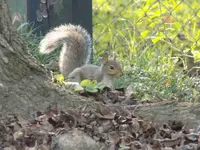
I liked the composition of the image, but the image is too "homogeneous" ... no real contrast to anything. Just doing a "brightness/contrast" adjustment layer ruined the image. Why? Because it affects everything evenly.
Tried the standard way of dodging and burning, but wasn't happy with the results or the time it took me.
This is the same image after a successful dodge and burn operation ... and a "selective focus" adjustment in Paintshop Pro 2018:
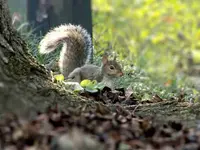
I used two burn layers, one set at 20% opacity (for the tree and leaves) and one set at 15% opacity (for the rodent). I grabbed the paintbrush tool with a slight feather and painted black where I wanted to add some detail. By setting the opacity of the layer, I'm just painting. It gives me a bit more control and I can come back with another burn layer if I need one, or even use the burn tool instead.
I also used the dodge tool with a bright yellow at 10% opacity to add the highlights in the tail and along part of the tree as well as the vegetation between the squirrel and the tree where light was already hitting.
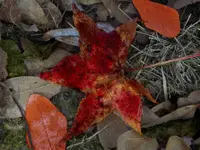
Also, using these blend modes, you're not limited to white for dodging or black for burning. I burned the large leaf with burgundy, two with an orange, and some with a dark green. I also added a "texture" to the original image. I created the texture by using a filter to create a highpass image that was mostly a middle grey with dark and light areas, using the "hard light" blend mode makes it look like the texture is part of the image. Notice the texture on the big leaf.
Don't be afraid to experiment.
What I discovered that helped me (still a way to go, but getting better) was playing with the dodge and burn blend modes.
For instance, this is the unretouched version of the pic:

I liked the composition of the image, but the image is too "homogeneous" ... no real contrast to anything. Just doing a "brightness/contrast" adjustment layer ruined the image. Why? Because it affects everything evenly.
Tried the standard way of dodging and burning, but wasn't happy with the results or the time it took me.
This is the same image after a successful dodge and burn operation ... and a "selective focus" adjustment in Paintshop Pro 2018:

I used two burn layers, one set at 20% opacity (for the tree and leaves) and one set at 15% opacity (for the rodent). I grabbed the paintbrush tool with a slight feather and painted black where I wanted to add some detail. By setting the opacity of the layer, I'm just painting. It gives me a bit more control and I can come back with another burn layer if I need one, or even use the burn tool instead.
I also used the dodge tool with a bright yellow at 10% opacity to add the highlights in the tail and along part of the tree as well as the vegetation between the squirrel and the tree where light was already hitting.
Also, using these blend modes, you're not limited to white for dodging or black for burning. I burned the large leaf with burgundy, two with an orange, and some with a dark green. I also added a "texture" to the original image. I created the texture by using a filter to create a highpass image that was mostly a middle grey with dark and light areas, using the "hard light" blend mode makes it look like the texture is part of the image. Notice the texture on the big leaf.

Don't be afraid to experiment.
Amazon Forum Fav 👍
Last edited:


