SHARKPIT 2- THE EXPERIMENT CONTINUES

F

Floater

Guest
WELL I KNOW ITS BEEN A WHILE AND WE HAVE SOME GROUND TO MAKE UP SO LETS GET TO IT.​

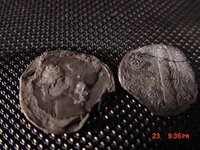
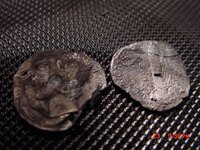
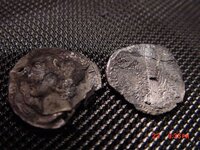
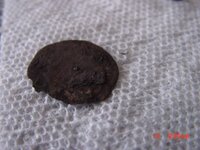
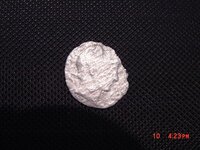
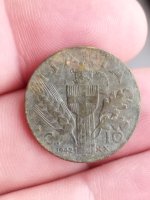
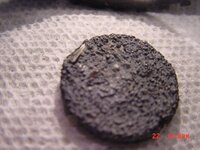
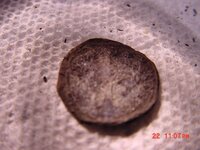
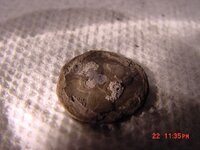
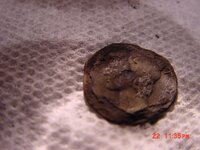
The second batch of cookies arrived before I was done with the first batch by a few days. I wish I had the exact date now but i will dig it up somewhere. Once again this was two smaller cookies and one quarter size piece. ( Rob is consistent ) ;D

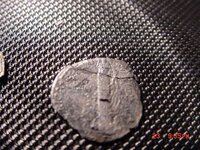
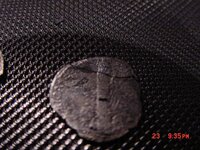
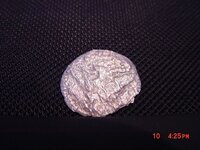
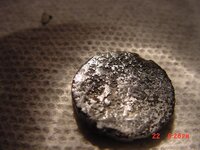
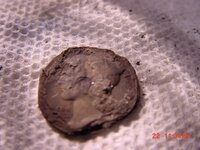
Anyway I first put a smaller coin in the Electrolysis. I am using a .500mA power supply on this one but it is 24 volts.remeber the last batch was all done with a 130 mA 12 volt. Prior to it being put in I had it soaking in the Soda Ash for at least 5 days. Just before putting it in I decided to experiment some more and used my Dremel tool with the drum sander on it.
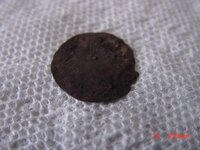
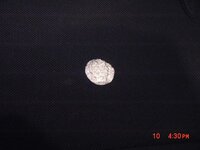
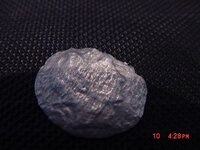
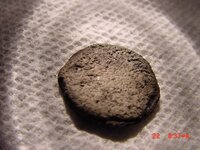
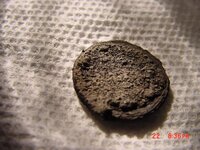
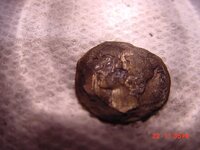
I sanded down one side just to a smooth point but not going beyond the flat surface. remember these coins all look like they have bubbles on them that are very hard so i just smoothed until they were gone. I reasoned that if I removed this material maybe the Electrolysis would work quicker and not damage or cause the coin to flake apart as quickly like the first coins. OK so here is the first pics.
 

Attachments

  • mrc29.jpg
    mrc29.jpg
    40.3 KB · Views: 326
  • mrc32.jpg
    mrc32.jpg
    43.6 KB · Views: 310
OP
OP
F

Floater

Guest
IS THE POWER TO MUCH ?​

Well after only two hours the coin is coming along just fine. Since I sanded the one side you can see that this side is coming much cleaner much quicker also. I was really encouraged by this. I rinse the coins after each check to get the loose grime off. I don't have pictures of what this looks like but I will on the next coin. Here is the 2 hour mark pics.
 

Attachments

  • mrc14.jpg
    mrc14.jpg
    46.5 KB · Views: 329
  • mrc24.jpg
    mrc24.jpg
    50.4 KB · Views: 324
OP
OP
F

Floater

Guest
MERCURY RISES​

So after about 4 and a half hours we get to see the Dude with the wings. He hasn't melted but is in tough shape. I was dissapointed that the date dissapeared but I believe it was a 1916 if I remeber correctly. This is the first year for the Mercury and it was hard to see as it chipped or dissolved off the right bottom side before I could get a photo off. IN GOD WE TRUST also deteriorated through the process. Here are the pics. Also a quick note again about how the photo are so important. I just got lazy on this because it was late . This is also a good point of the restoration and conservation process. If the item does deteriorate in the process as these have then at least we have a photo for some documentation.
 

Attachments

  • mrc19.jpg
    mrc19.jpg
    42.1 KB · Views: 309
  • mrc22.jpg
    mrc22.jpg
    40.3 KB · Views: 307
  • mrc20.jpg
    mrc20.jpg
    39.6 KB · Views: 309
OP
OP
F

Floater

Guest
HAND CLEANING​

Well after about a half hour of cleaning it with cotton swabs and bruhes dipped in alcohol I finnally got most of the crud off the face. I use a very thin metal toothpick with a sharpened point that you can see the scratching process . This is not gouging but just removing very carefully the junk left on the coin and exposing the surface. I use the magnifying glass and it is very tedious but at this point I felt it safer than the Elcetrolysis. Here are the last pics for today.
 

Attachments

  • mrc28.jpg
    mrc28.jpg
    36.8 KB · Views: 302
  • mrc26.jpg
    mrc26.jpg
    36.2 KB · Views: 299
  • mrc25.jpg
    mrc25.jpg
    37.3 KB · Views: 300

Ilovetodig

Full Member
Feb 14, 2005
182
9
Now in Guam
Detector(s) used
ACE 250/ Fisher D2
Your getting better at it Floater. It was good to see you could get this far without losing the coin totally. Perhaps if you sanded both sides next time it wouldn't flake as much in the process. Just a thought.
 

OP
OP
F

Floater

Guest
Vrent said:
that was a 1916 d right floater???? ::) ::) was that the liilte cookie that you showed me? what happened to the other? finally go to dust?

HH Vrent
No Vrent, you were thier when I pulled the Quarter size one out This is the one I have already sent back to Rob and Im glad I have you as a witnes to the other coin . When I post on that one which will be later this week your testimony will be Important.LOL :D Just dont spoil it yet. I have your Shades too. PM your Address or tell me when your coming back for them. There could be a storage charge though. ;D
Later. HH
 

M

mchamby

Guest
Wow this takes me back quite a few years ago to sience class. This was very educational floater and interesting at the same time, I know a lot of us are interested in what Robs cookie coins turn out to be. Thanks for the great pics and story.
Mchamby
 

OP
OP
F

Floater

Guest
THE SPLIT​

Well as we progressed to the next day with this coin I started on the back side of it. As I was starting the cleaning by hand with the swabs the junk was comming off pretty good and suddenly the coin actually seperated in half but not the way you think. It actually split in half making two fulll pieces.
 

Attachments

  • rtdmrc4.jpg
    rtdmrc4.jpg
    59.1 KB · Views: 262
  • rtdmrc5.jpg
    rtdmrc5.jpg
    60.4 KB · Views: 246
  • rtdmrc6.jpg
    rtdmrc6.jpg
    60.5 KB · Views: 248
OP
OP
F

Floater

Guest
Here are the last two pics for this coin. As you can see trying to get the best definition out of the back it cracked at the top also .
 

Attachments

  • rtdmrc7a.jpg
    rtdmrc7a.jpg
    57 KB · Views: 258
  • rtdmrc8.jpg
    rtdmrc8.jpg
    56.8 KB · Views: 240
OP
OP
F

Floater

Guest
A BARBER REALE ?

The mission went astray here on the larger cookie which as we all know usually means a barber quarter. Vrent had come down and I was experimenting with it in the Electrolysis that night. After dinner Vrent and I pulled it out and I rinsed it off under the water and then we started looking at it under the magnifying glass. We found the date had exposed clearly the nine on the coin and we both tried looking at it at different angles to see more detail and concluded it was either an 1899 or an 1889 Barber. YA HOO. Well vrent left that night and I put the cookie back in the soaking solution for the night. Well as life goes I didn't get back to it until Saturday and I was working around the house so I decided I would put it in the Electrolysis and take it out every so often and check on it. Well the call came about my Step father dying and I forgot all about it for the whole day. Then that night after all the calls and getting my travel arrangements I go outside and their is the machine and I go OH #$)( %. Well this is what it looked like.I thought that it was a total goner. This was what I saw.
 

Attachments

  • barreale11.jpg
    barreale11.jpg
    33.7 KB · Views: 238
  • barreale6.jpg
    barreale6.jpg
    30.3 KB · Views: 237
OP
OP
F

Floater

Guest
IT LIVES !

Well I thought it was all over except the crying at this point. I carefully rinsed off what is left clinging to the paper clip holder and then see this flat piece of nothing. I said their is no way I will ever see anything now.I begin cleaning and this thing actually has detail. Not a lot but when you see how thin and what is left you will all realize that this is amazing. This is what it first looked like after the wash.
 

Attachments

  • barreale9.jpg
    barreale9.jpg
    45.3 KB · Views: 243
  • barreale8.jpg
    barreale8.jpg
    42.2 KB · Views: 233
  • barreale7.jpg
    barreale7.jpg
    42.2 KB · Views: 244
OP
OP
F

Floater

Guest
IT SHINES

After pulling all the tools out including the Dremel tool I decide I had better really do my best on this. I keep saying to myself everyone is going to be really ticked off that I let this go and the whole thing is gone to Hell. Well I start off swabbing it down and I start to see some of the relief on one side . I say to myself no way we will see anything because this is the center of the coin for all practical purposes. The stamping of the Planchet when it was new doesn't penetrate down all that far into the metal. WRONG!
Even back then the stamping as you will see of US coins was a precision process down to the finest detail and they knew exactly what the half way point was with the pressures applied and every thing down to the last ounce or in this case milligrams.Here is the front.
 

Attachments

  • barreale4.jpg
    barreale4.jpg
    38 KB · Views: 248
  • barreale3.jpg
    barreale3.jpg
    46.2 KB · Views: 234
  • barreale10.jpg
    barreale10.jpg
    64.2 KB · Views: 236
OP
OP
F

Floater

Guest
OK here is the Back .
 

Attachments

  • barreale.jpg
    barreale.jpg
    42.5 KB · Views: 246
  • barreale2.jpg
    barreale2.jpg
    53.2 KB · Views: 241
  • barreale5.jpg
    barreale5.jpg
    41.8 KB · Views: 232
OP
OP
F

Floater

Guest
Now after looking at the last six pictures here is the one that blows all logic away. I guarentee you that this metal coin as it exists now is no thicker than a piece of aluminum foil. Here ya go and that concludes this set gang I will work On the last coin of this batch soon and will post.
 

Attachments

  • barrealet.jpg
    barrealet.jpg
    26.6 KB · Views: 211
  • brrealet1.jpg
    brrealet1.jpg
    22.2 KB · Views: 215
  • barrealet3.jpg
    barrealet3.jpg
    30 KB · Views: 209

Ilovetodig

Full Member
Feb 14, 2005
182
9
Now in Guam
Detector(s) used
ACE 250/ Fisher D2
Considering the circumstances Floater I think we can all forgive you for forgetting about the coin. You did a fantastic job recoving it afterwards. My condolances on your loss and may your next attempt be even more successful.
 

OP
OP
F

Floater

Guest
Thanks Gang.
This one is shiny and silver. The one thing I have found and AF if your reading this is don't use any silver polish to brighten the coin. What works here is just buffing it down and brushing it every so often to keep getting the last thin film off so the metal brightens. I also used the dremel with the buffing wheel after this to really bring it up. The other thing I have learned is that like AF checking these every fifteen minutes or so in the electrolysis is key to stabilizing the process and it really makes a difference. I am sending this one back to Rob today,even though it is just a really thin piece at least it looks silver and is clean and stable.I also am going to really try and document with pictures as much of the process again on the last coin I have and will try AF's method with the Baking soda and vinager mix.I am waiting for my new power and amp regulator before I start this last one. ;D HH
 

Top Member Reactions

Users who are viewing this thread

Top