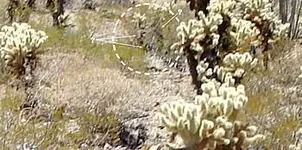
I will quit posting photo's from now on, due to the extreme tremors I have. I did my best
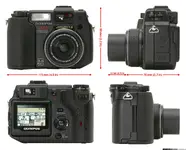
John don't stop taking and posting photos on my account as OV and Digger has given you some great advice. Another thing you can do to help is to increase your shutter speed. By all the expensive toys you have I suspect your carrying around an expensive camera. Put the camera in shutter priority around 500th of a second. Then the camera will select the the F stop "aperture" of which is the amount of light the lens will allow to hit the film, chip. etc. The higher the F stop F/1.2 - F/32 number the greater the depth of field, more of the image further from the lens is in focus. There is another trick to use and its called Hyperfocal Distance.
One of the most important things to understand when taking landscape photographs is how depth of field works, and how you can make use of it to make better images. It is usual to include foreground details in the shot, as this helps to balance the whole image, and helps to lead the viewer's eye into the image, how do you ensure that both the foreground objects and the distant landscape are in focus?
When you focus at a particular point in the image, other objects some distance in front of and behind the subject will also be in focus. The range of these in-focus objects either side of the focal point is called the depth of field. Exactly how far in front and behind your subject will remain in focus can be controlled by altering the F-stop setting of your lens. You really want to have as much of the scene in focus as possible, so the obvious choice is to use a very small aperture setting to maximise depth of field. But, maximising the depth of field won't ensure that your entire scene is in focus. You need to know exactly where to focus your lens. If you select a point of focus too close , the foreground and middle-scene will be covered by the depth of field, but distant objects will be blurred.
As the depth of field extends both in front and behind the focal point, ( 1/3 in front of focal point, and 2/3 behind ) the solution is to use manual focus, and to focus on a point somewhere between the foreground and the distance, so that the extreme distance (effectively infinity) is contained in the "sharp zone", the closest object in your frame is at the nearest end, and everything in the frame is in focus. This point, at which the depth of field is maximized within the field of view, is known as the hyperfocal distance. The amount of distance that appears in acceptable focus will start at halfway from this point to effective infinity.
Calculating exactly where this hyperfocal point exists, relies on a mathematical equation, as per example:
H = fl * fl / Ac+ fl
In this formula, H is the hyperfocal distance (measured in millimetres), fl is the focal length of the lens (also in millimetres), A is the f-stop number of the aperture, and c is the diameter of the "circle of confusion". In digital crop DSLR’s the accepted value of c is approximately 0.020mm, since that results in a relatively sharp image on the sensor; so for example with a 18mm lens at an aperture of f22, the hyperfocal distance, the point at which depth of field is optimised, is:
H = 18*18
22*0.02 + 18 = 754.36mm
Or 2 feet- 6 inches . As you can see, setting your camera on infinity means that you are missing out on a lot of potential foreground
detail. It also shows that you don't really need to use the absolute smallest aperture setting. Using the same 18mm lens at a wider aperture setting of f11 still gives a hyperfocal distance of 1500mm (approximately 5 Feet, giving a depth of field from 750mm ( 2 feet six inches to infinity), and will produce better image quality, due to eliminating diffraction problems that using F 22 would bring.


