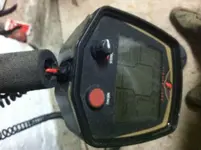
If you cant find replacement parts and the detector is working fine and Idea you might try if your inclined to do a bit of tin bending... you can get these materials from and Ace Hardware store. Basically your going to build a brace and epoxy it together. Tools a hammer, file, pliers, hack saw or metal shears, and a screwdriver should be sufficient. A c-clamp of at least 6 inches is also desirable but a brace can be jerry rigged and tape used for aligning and mounting the monitor to the brace.
If you do this its at your own risk. This is simply an idea and something I would try if faced with the same problem.
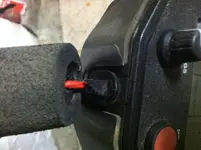
remove about 1 inch of the foam from the handle, get yourself a hose clamp, a piece of aluminum or brass stock as wide as the handles diameter 1/8 inch thick at least 6 inches long, an epoxy or gorilla glue, a little sand paper and some electrical tape.
Your removing the foam on the handle to provide an area for the base of the brace and the hose clamp to be mounted. Clean the exposed area with the sandpaper as you will be appling your adhesive here later to anchor the brace to the handle. The hose clamp will also remain here as well.
Form the brace from your piece of metal stock. Cut the stock so that you have 1 inch covering the handle shaft and at least 2 to 3 inches, in all about 4 inches long, to run up the back of the detector screens back. Using the hammer or pliers place a slight Z bend at the point on the brace were it transitions from the handle to the back of the monitor. This may take a couple of tries and most small metal stock usually comes in 12 inch pieces so you should have 3 tries. Make this bend as close as possible to the natural resting place of the monitor on the handle as possible.
Once the brace is formed use your file and knock off any shape edges and slightly round the lower brace edges where it will be clamped to help accommodate the clamp.
Scuff the metal where it meets the handle and monitor faces, scuff the monitor face were it meets the brace. You should have already scuffed the handle shaft. Reason for the scuffing is to help the epoxy or adhesive tack the surfaces together better.
Now comes the tricky part. Mounting the brace and aligning the monitor.
Set the brace and the clamp onto the handle and slightly tighten the clamp but just enough so you can adjust it left to right. Set the monitor were it would mount on the handle and adjust the brace so its flat to the monitor. With a pencil, pen or scribe hold this in place and mark were the brace will be on the back of the monitor.
At this point if you have the 6 inch c-clamp its a bit easier to mount the brace solidly to the monitor. But I'll go over procedure A, without clam, first.
Procedure A : Get a couple of heavy books, phone books would be best, these will be used as a face surface for your monitor and a weight for pressing the brace while the epoxy or adhesive sets. Set the monitor face down on the first book. Get your electrical tape ready by applying it to the back of the brace in a solid sheet from where the bend is to the top of the brace. The sheet should be at least 3 inches wide. This will hold the brace in position and keep the epoxy from glueing you book to the back of the detector. Apply the epoxy/adhesive to the brace and to the area you outlined on the back of the monitor. Don't use gobs of it just a light coating will do. Now set the brace where you outlined it on the monitor, align it if necessary, and when positioned press the brace down firmly and press the tape down firmly. Now carefully place the other heavy book over the brace on the back of the monitor and let it set for at least 8 hours. Make sure the other book is pressing on the brace, a couple of pieces of card board on top of the brace will help if there is a gap when you lay the book down.
Procedure B : Much like procedure a instead use a c-clamp to apply pressure to the brace until the epoxy/adhesive has set for at least 8 hours. Using a c-clamp you will need to use a pad on the brace, a small piece of card board, and you will need to use a thin board, if you have any stock left and its wide enough to cross the monitor face, or at worst at least a couple of pieces of card board to cover the face of the monitor where the other side of the c-clamp will contact the monitor.
Using procedure A and having stuck the brace to the back of the monitor and setting it with tape place a small piece of cardboard were the c-clamp will contact the brace. Place your padding or brace across the front of the monitor and position the c-clamp then tighten. Don't tighten to far, just enough to give the brace a firm pressure.
Now wait.
After your wait the brace should be mounted to the monitor. Test this a bit, stress it, and make sure the brace does not come off. If it does then the adhesive used probably wont work and you can try another. If it stresses and does not break move on to the next step. When using a different adhesive you will have to clean the old adhesive off first.
Mounting the monitor:
Apply your epoxy/adhesive to the base of the brace and the break point between the monitor and handle. You can go a little heavy on the epoxy/adhesive as this will add extra bulk to the weld. With the hose clamp in place slide the parts together, align and then tighten the hose clamp firmly. Wait 8 hours for the parts to set up. Your monitor should now be in good shape.
Using your electrical tape wrap layers around the hose clamp to pretty it up and prevent it from being uncomfortable.
If the monitor breaks free again you can re-attach it or ask me and I can give you a couple of other ways to re-inforce the brace.
using ruffly the same procedure you can also install a couple of side braces to the underside of the monitor as reinforcement. However these can be installed after the back brace is built and provide you can get the hose clamp back off after every thing is set. A little tape between the back brace epoxy/glue and the clamp when you mount the monitor should help you remove the clamp later if you opt for side braces.
Luck to ya.
Thanks for reading.